
Your entire apartment is one room — so stop decorating it like one. The best studio apartment decor starts with a mindset shift: think in zones, not rooms.
A studio isn’t a small living room with a bed shoved in the corner. It’s four rooms wearing a trench coat: a bedroom, a living room, an office, and a kitchen, all sharing the same 400 square feet. The moment I stopped trying to make my first studio look like a “normal” apartment and started treating it as four zones in one open space, everything clicked. The bed stopped staring at me during dinner. Work stopped bleeding into sleep.
This guide gives you 19 studio apartment decor ideas organized the way a studio actually works: first you pick your style (a 60-second picker), then you zone the space (5 layout tricks), then you build the sleep zone (4 ideas), the live and work zones (4 ideas), the eat and storage zones (4 ideas), and finish with a finishing layer (2 ideas) that makes every zone glow. Every idea is renter-friendly, every idea carries a realistic budget, and none of them require a drill into a landlord’s wall — or if they do, I’ll tell you the no-drill alternative.
Table of Contents
- What Is Studio Apartment Decor?
- Why You’ll Love These Studio Apartment Decor Ideas
- Find Your Studio Style in 60 Seconds
- Zone the Space: 5 Layout Tricks That Split One Room Into Three
- The Sleep Zone: 4 Ideas for a Bedroom That Disappears by Day
- Live + Work Zones: 4 Ideas for a Living Room and Desk That Share 200 Sq Ft
- Eat + Store: 4 Kitchen and Storage Ideas for a Studio With No Pantry
- The Finishing Layer: 2 Ideas for Light and Life
- How to Make It Your Own: Studio Apartment Decor on Your Terms
- Studio Decor on Any Budget
- 6 Studio Apartment Decor Mistakes to Avoid
- Studio Apartment Decor at a Glance
- FAQ About Studio Apartment Decor
- Final Thoughts on Studio Apartment Decor
What Is Studio Apartment Decor?
Studio apartment decor is the art of making one open room function as a bedroom, living room, workspace, and kitchen through zoning, multifunctional furniture, and visual tricks — without building a single wall. That’s the core promise of studio apartment decor.
Here’s the thing most decor advice gets wrong about studios: it treats them like small living rooms. But a studio’s real problem isn’t size — it’s boundarylessness. When your bed is six feet from your desk and your “dining room” is the kitchen counter, your brain never fully switches modes. You eat where you work. You scroll where you sleep. Good studio apartment decor fixes that with psychology as much as furniture: rugs, lighting, and dividers that tell your brain this corner is for rest, that corner is for work. I’ll be honest — no layout trick gives you a real second room. But the right zones can give you the feeling of three, and that feeling changes how the whole apartment lives.
Why You’ll Love These Studio Apartment Decor Ideas
- One room, three moods. Zoning lets you “leave work” by walking ten feet to the living zone — your evenings finally feel like evenings.
- Built for renters. 17 of these 19 ideas need zero drilling, zero paint, zero landlord negotiations. The other two have no-drill alternatives.
- Honest budgets. Every idea lists what it actually costs — most land between $25 and $200, and several are free rearrangements.
- Small space, big calm. Studios get chaotic fast because everything is visible at once. These ideas hide the chaos instead of fighting it.
- Tested in real studios. I’ve lived the one-room life and helped friends zone theirs. The ideas that survived are the ones here — including the mistakes I made first.
Find Your Studio Style in 60 Seconds
Before you buy a single thing for your studio apartment decor, pick a lane. A studio shows everything at once, so mixing four styles reads as chaos — one style repeated across zones reads as design. Ask yourself honestly: which of these four makes you exhale?
Japandi (my pick for most studios). Warm minimalism: light oak, cream textiles, one black accent, low-profile furniture, nothing you don’t use. Calm without being cold, and it hides the fact that your “dining room” is a cart. For you if: clutter stresses you out and you want the studio to feel like a deep breath.
Modern Minimal. Crisp white, pale gray, chrome or matte black, hidden storage, hard angles. Stunning in a studio with great light — and punishing if you’re secretly a cozy-textiles person, so be honest about which one you are. For you if: you own under a hundred things and like it that way.
Cozy Bohemian. Layered rugs, rattan and cane, plants everywhere, warm terracotta and ochre, collected art. The most forgiving style for renters because “collected” hides a multitude of sins. For you if: your apartment should feel like a hug and you thrift more than you buy new.
Industrial. Black metal shelving, leather, concrete-look planters, Edison bulbs, brick-look peel-and-stick if your walls are plain. Made for converted warehouses; can feel cold in a generic new-build box. For you if: you love raw materials and your building already has the bones.
The rule that matters: pick one style and repeat its materials in every zone. Same wood tone, same metal, same 3-color palette from the bed nook to the kitchen cart. That’s what makes four zones read as one home. I learned this the expensive way — my first studio had a boho sleep corner, a minimalist desk, and an industrial kitchen cart, and it looked like three roommates who’d never met.
Try it: save 10 studio photos you love, then look at what they share — the common thread is your style, even if you couldn’t name it before.
Zone the Space: 5 Layout Tricks That Split One Room Into Three
Before you buy a single thing, you zone. Layout is 70% of studio apartment decor — I’d rather see a well-zoned studio with thrifted furniture than a badly-zoned one with designer pieces. These five tricks cost little or nothing, and they do more than any single purchase.
1. Float the Sofa to Build an Invisible Wall
Before: the bed is the first thing you see from the front door, and the whole room reads as “bedroom with stuff in it.” After: you walk in and see a living room — the bed hides behind the sofa like it has its own zip code.
Push your sofa (or loveseat, or even two chairs) into the middle of the room with its back facing the bed. That sofa back becomes a wall your eyes accept instantly. I fought this for months in my first studio because floating furniture felt like “wasting” floor space behind it. Wrong — that dead space behind the sofa is the cheapest room divider you’ll ever own. Keep 2–3 feet of walkway behind it so it doesn’t feel barricaded.
Renter-friendly: 100% — it’s just furniture placement. Budget: $0. Try it: tonight, drag the sofa 3 feet off the wall facing away from the bed, and live with it for 48 hours before you decide.
2. Use an Open Bookshelf as a Room Divider
Before: one long bowling-alley room where the eye slides from kitchen to bed with nothing to stop it. After: a bookshelf standing perpendicular to the wall chops the sightline, and each side feels like its own room.
The key word is open — a KALLAX-style cube shelf or any open-back bookcase lets light through, so the room doesn’t get dark and cave-like the way a tall dresser divider would. Style the cubes facing the living zone with books and a plant; the bed side can hold folded clothes and baskets. Leave the top surface clear — the moment you stack clutter on it, the divider becomes a wall of mess.
Renter-friendly: yes, freestanding. Anchor it to the wall with a removable adhesive anti-tip kit if you have kids or earthquakes. Budget: $60–$120 for a 4-cube unit (IKEA, Target, or Facebook Marketplace for $30). Try it: measure the spot first — a 30-inch-wide unit divides without eating the walkway; anything over 16 inches deep starts to feel bulky.
3. Give Every Zone Its Own Rug
Before: one big rug (or bare floor) unifies everything into a single visual blob. After: three rugs in the same color family tell your brain “living room ends here, bedroom starts there” — even though the floor never changed.
This is the fastest zoning trick I know. The rugs don’t need to match; they need to relate — same palette, different patterns. A flat-weave rug under the living zone, a soft shaggy one by the bed, a washable runner in the kitchen strip. Washable rugs (Ruggable-style or any machine-washable low-pile rug) are worth it in a studio because every rug is also a dining rug, a desk rug, a life rug.
Renter-friendly: completely. Budget: $40–$90 per rug; start with just the living-zone rug if money’s tight. Try it: lay down painter’s tape outlines of rug sizes before buying — in a studio, a rug that’s 6 inches too big swallows the walkway.
4. Hang a Ceiling Curtain Track Around the Bed
Before: you fall asleep staring at your desk, and your “bedroom” is a mattress in public. After: you draw a curtain and the bed vanishes — guests see a living room, and your brain gets a real bedtime cue.
A ceiling-mounted curtain track (the flexible IKEA VIDGA-style track) curves around two or three sides of the bed, hung with adhesive ceiling hooks or tension-mounted — no drilling into the ceiling in most rentals if you use heavy-duty removable hooks rated for the weight. Choose linen-look curtains in a light color; heavy blackout curtains make the nook feel like a cave. I resisted this idea for a year because it felt “dorm room.” Then I tried it. Drawing that curtain at 10pm is the closest thing to leaving the office when your office is ten feet from your pillow.
Renter-friendly: yes with adhesive ceiling hooks (check weight ratings) — skip if your ceilings are textured popcorn, hooks won’t hold. Budget: $50–$100 for track + two curtain panels. Try it: hang just one straight track across the bed’s foot first — even a single curtain panel breaks the sightline from the door.
5. Ditch the Overhead Light for Three Lamp Zones
Before: one harsh ceiling light flattens the whole studio into a single interrogation room. After: a warm floor lamp by the sofa, a task lamp at the desk, and a soft bedside glow — three pools of light, three rooms.
Overhead lighting is the enemy of zoning because it treats the whole room as one space. Kill it (or just never turn it on) and give each zone its own lamp at a different height: arc or tripod floor lamp for living, clamp or desk lamp for work, small table lamp or wall sconce for sleep. Put them on warm-white bulbs (2700K — the cozy yellow, not the blue-white 5000K that makes everything feel like a dentist’s office). Smart plugs ($10 for a 4-pack) let you switch zones with your phone.
Renter-friendly: 100%. Budget: $25–$60 per lamp; thrift stores are full of great ones. Try it: tonight, turn off the overhead and light just the bed zone lamp — notice how the rest of the room mentally disappears.
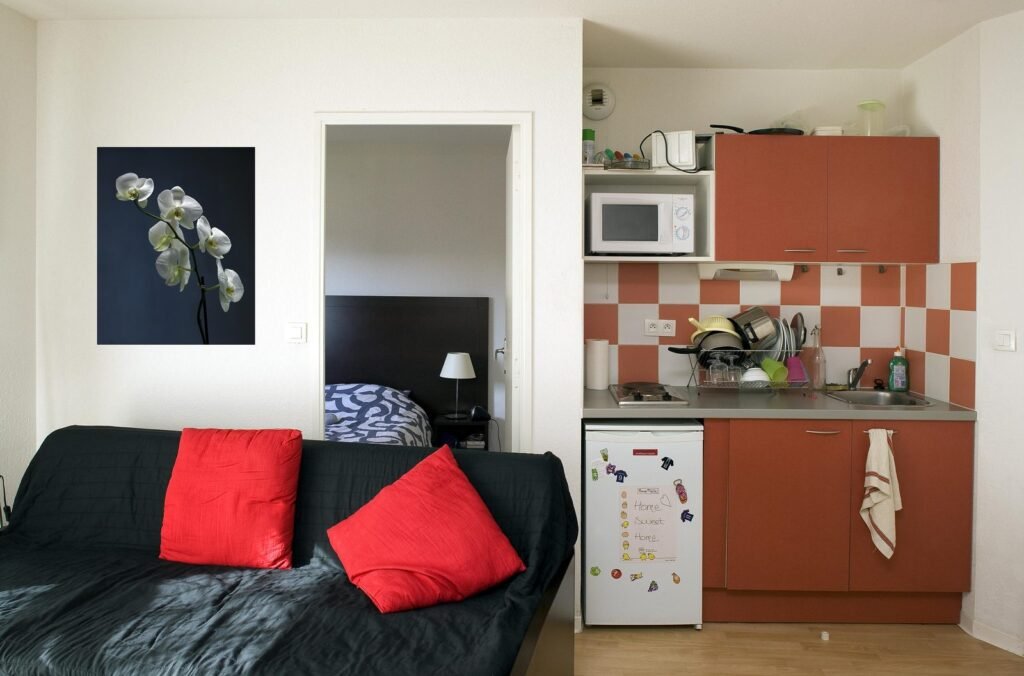
The Sleep Zone: 4 Ideas for a Bedroom That Disappears by Day
The sleep zone has one job: feel like a bedroom at night and not like a bedroom at 2pm when a friend drops by. Everything here is about making the bed visually quiet. A calm sleep zone is the foundation of good studio apartment decor.
6. Choose a Daybed That Reads as a Sofa
Before: a standard bed frame screams “bedroom” 24/7 and kills any living-room illusion. After: a daybed with a back and arms looks like a deep sofa by day — throw pillows on, and guests genuinely ask where you sleep.
A daybed is the single highest-impact furniture choice in a studio. Get a twin-size daybed with a trundle underneath and you’ve also solved guest sleeping and hidden storage in one purchase. Style it like a sofa, not a bed: lumbar pillows across the back, one throw blanket folded over the arm, no sleeping pillows visible (stash them in the trundle by day). I’ll admit the downside — a daybed mattress is thinner than a real mattress, so invest in a 3-inch memory foam topper ($60–$80) and you’ll sleep fine.
Renter-friendly: yes. Budget: $200–$400 for the frame; $30–$80 on Marketplace. Try it: if a new frame isn’t in the budget, push your existing bed against the wall long-side and pile on sofa-style pillows — the daybed illusion is 80% styling.
7. Dress the Bed in the Room’s Palette
Before: a navy duvet in a cream-and-sage room — the bed becomes a big dark billboard that pulls every eye. After: bedding in the room’s own colors lets the bed visually dissolve into the background.
This is color psychology doing free labor. When the bed matches the walls and rugs, your eye slides right past it toward the living zone. Pick bedding one shade deeper or lighter than your wall color — cream walls, oatmeal duvet, sage throw. Avoid high-contrast patterns on the duvet; save the pattern for two small throw pillows. White bedding looks crisp in photos but shows everything in a studio where the bed is also the couch — a warm greige or oatmeal hides a multitude of sins.
Renter-friendly: completely. Budget: $40–$80 for a duvet cover set. Try it: drape a flat sheet in your wall color over the bed for a day — if the room instantly feels bigger, commit to the palette.
8. Put the Bed on Risers and Claim the Space Underneath
Before: 7 inches of dusty dead space under the bed collecting lost socks. After: 12 inches of organized storage holding your off-season clothes, shoes, and the vacuum.
Bed risers ($15–$25 for a set of four) are the most boring and most transformative $20 in studio living. The reclaimed space fits flat under-bed bins, a low rolling drawer, or vacuum-sealed bags of winter coats. Measure first — most bins need 10+ inches of clearance, so get the tallest stable risers and a bed skirt or long coverlet if the exposed under-bed bothers you. One warning from experience: cheap plastic risers crack. Get the solid wood or steel ones.
Renter-friendly: yes. Budget: $15–$25 for risers + $20–$40 for bins. Try it: slide one empty bin under the bed today to test your clearance height before buying a full set.
9. Swap the Nightstand for a Wall Shelf and Sconce
Before: a chunky nightstand eats 4 square feet of floor next to the bed — floor you don’t have. After: a 12-inch wall shelf holds the book, phone, and water; a plug-in sconce above it gives reading light with zero footprint.
In a studio, floor space is the currency and nightstands are expensive. A small floating shelf mounted with adhesive strips or tiny nails (most leases allow small nail holes) at mattress height does the whole job. Pair it with a plug-in wall sconce — the cord drops behind the bed, no electrician needed. If even adhesive feels risky, a slim rolling cart (12 inches wide) tucks beside the bed and pulls out when you need it.
Renter-friendly: yes — adhesive-mount or lean options available. Budget: $20–$45 for shelf + sconce. Try it: a sturdy hardcover book stack as a “shelf” for a week tells you exactly what size surface you actually use.

Live + Work Zones: 4 Ideas for a Living Room and Desk That Share 200 Sq Ft
Here’s the cruelest studio math: the living room and the office want the same square footage, at the same time, every weekday. These four studio apartment decor ideas let them time-share gracefully.
10. Mount a Fold-Down Desk for the 9-to-5
Before: working from the couch or the kitchen counter — your back hates you and work never really “ends.” After: a wall-mounted drop-leaf desk folds down for work hours and vanishes into a slim console shelf by 6pm.
This is the work-life boundary your studio desperately needs. A 30-inch fold-down desk holds a laptop, notebook, and coffee — that’s all most of us use. When it’s folded up, style the surface with a small plant and a candle so it reads as decor, not an office. Mounting needs 4 screws; if that’s a no-go, a narrow console table (12 inches deep) against the wall does the same job without holes. I worked from my sofa for 8 months and my chiropractor bills were higher than any desk would have cost.
Renter-friendly: yes with a freestanding console alternative. Budget: $70–$150 wall-mounted; $40–$80 console table. Try it: tape a 30×16-inch rectangle on the wall at desk height — if the size feels workable for a week, buy the desk.
11. Trade the Coffee Table for Nesting Tables
Before: a big coffee table anchors the living zone but blocks every path and can’t move when friends come over. After: two nesting tables tuck into each other daily, then fan out into side tables, laptop stands, and serving surfaces on demand.
Nesting tables are the Swiss Army knife of studio furniture. Daily life: one small table in front of the sofa. Movie night: pull the second one over for popcorn. Work overflow: it’s a laptop side table. Dinner for four: they’re serving stations. Get a set with different heights so they actually nest instead of just stacking awkwardly. Round tops are kinder to shins in tight walkways — trust me on this one.
Renter-friendly: yes. Budget: $50–$110 for a set of two. Try it: push your coffee table against the wall for three days and use a side table instead — if you don’t miss it, sell it.
12. Buy One Great Chair, Not a Cramped Loveseat
Before: a too-small loveseat seats 1.5 people uncomfortably and visually clutters the room. After: one generously-scaled accent chair with a small ottoman seats one person luxuriously — and looks intentional, not apologetic.
This is my most opinionated take in this whole guide: a bad loveseat is worse than no loveseat. In a studio, a cramped two-seater reads as “couldn’t afford a real sofa.” One beautiful chair — boucle, leather, or a vintage find — reads as a choice. Add a floor cushion or pouf for the rare second guest. The chair should swivel if you can swing it; a swivel chair turns to face the living zone or the window view, doubling its usefulness.
Renter-friendly: yes. Budget: $150–$350 new; $40–$100 vintage/thrifted. Try it: sit in it before you buy — seat depth matters more than looks when it’s your only real seat.
13. Go Vertical With One Tall Gallery Wall
Before: art scattered at eye level around the room chops the walls into busy fragments. After: one floor-to-near-ceiling gallery column draws the eye up, makes ceilings feel taller, and concentrates the “decorated” feeling in one powerful spot.
Pick the wall your sofa faces (or the wall behind the desk) and build one vertical arrangement: 5–7 frames in a loose column, mixing sizes. Keep frames in two finishes max (black + oak is foolproof). Use removable adhesive strips for everything under 5 lbs — a full gallery wall hung damage-free is absolutely doable, I’ve done it twice. Leave the other walls calm; in a studio, one loud wall plus three quiet walls beats four medium walls.
Renter-friendly: yes with adhesive strips. Budget: $30–$80 for frames (thrift + IKEA), prints from free museum archives or your own photos. Try it: lay the arrangement on the floor first and photograph it — the photo reveals spacing mistakes your eyes miss.
Eat + Store: 4 Kitchen and Storage Ideas for a Studio With No Pantry
Studio kitchens are usually a wall, not a room — four feet of counter if you’re lucky. And there’s no pantry, no linen closet, no “junk drawer” zone. These four studio apartment decor ideas manufacture both.
14. Roll In a Kitchen Cart That Works Triple Duty
Before: 3 feet of counter means cooking is a juggling act and there’s nowhere to chop. After: a rolling cart adds 8 square feet of prep space, stores the pots underneath, and rolls to the living zone as a bar cart on Friday night.
A kitchen cart with a butcher-block top and open shelving below is the hardest-working $100 in a studio. Park it against the kitchen wall daily; pull it out as an island when you cook; lock the casters and it’s stable. The open shelves are the trap — use matching baskets or bins so it looks organized, not like a rolling yard sale. I keep my air fryer, cutting boards, and the “nice” olive oil on mine, and it genuinely changed how often I cook.
Renter-friendly: yes. Budget: $80–$150. Try it: push your kitchen walkway — you need 36 inches clear when the cart is parked, or you’ll hate it within a week.
15. Get a Drop-Leaf Table That Seats Two or Four
Before: a fixed 4-person table eats 20 square feet permanently for meals that happen twice a week. After: a drop-leaf table hugs the wall as a 20-inch console daily, then opens to seat four when people come over.
This is the dining table for people who don’t have a dining room. Daily mode: one leaf down, it’s your entryway console or desk extension. Dinner mode: both leaves up, four chairs, done. Look for one with storage inside the pedestal — table linens and placemats live there. Gate-leg styles are sturdier than cheap drop-leafs; wobble is the number-one complaint, so check reviews for stability specifically.
Renter-friendly: yes. Budget: $120–$250. Try it: borrow two folding chairs before buying four matching ones — in a studio, chair storage is the real constraint.
16. Steal Storage From the Backs of Doors
Before: the bathroom door, closet door, and entry door are 21 square feet of vertical nothing. After: over-door organizers hold cleaning supplies, shoes, pantry overflow, and toiletries — an entire closet’s worth, invisible.
Over-the-door racks are unglamorous and unbeatable. The bathroom door gets a 3-tier wire rack for toiletries and towels. The closet door gets a shoe organizer — but skip the shoes and use the pockets for scarves, chargers, sunscreen, the random drawer of doom. The entry door (or entry wall) gets 4–5 sturdy hooks for coats and bags. Use the foam-backed hooks that don’t scratch; the $12 metal ones dent hollow doors.
Renter-friendly: yes — no screws, no damage. Budget: $12–$30 per organizer. Try it: start with the bathroom door — it’s the highest-impact 10 minutes in this entire guide.
17. Give Every Zone One Closed Storage Piece
Before: open shelving everywhere means every zone displays its clutter — the studio looks busy even when it’s “clean.” After: each zone gets one lidded basket, cabinet, or trunk where the visual noise goes to die.
This is the finishing rule that makes the other 16 ideas work. Open storage is honest storage — it only looks good if you’re ruthlessly curated. Closed storage is forgiving storage. One lidded basket in the living zone (throws, remotes, chargers), one lidded bin in the sleep zone (laundry, off-season), one cabinet in the work zone (papers, cables). When guests text “coming over in 20?”, you do a 10-minute sweep into the zone baskets and the studio looks magazine-ready. I can’t overstate this: the difference between a chaotic studio and a calm one is lids.
Renter-friendly: yes. Budget: $25–$60 per piece; woven seagrass baskets look expensive and aren’t. Try it: grab one lidded basket this weekend and do the 10-minute sweep test — you’ll buy two more by Monday.

The Finishing Layer: 2 Ideas for Light and Life
Zoning builds the rooms; these two ideas make them glow. In studio apartment decor, mirrors and plants are the finishing layer because they amplify everything above — more light in every zone, softer edges between them. Do these last, after the furniture is placed.
18. Mirror, Mirror: Double Your Space With Reflection
Before: the studio’s far wall is a dead end — dark, flat, and the room stops where the wall starts. After: a big mirror opposite the window bounces daylight across the whole room and the wall seems to keep going; the space feels twice as deep.
Mirrors are the cheapest square footage you’ll ever buy. In a studio they do triple duty: more light, more depth, and they let you “see” zones from angles you otherwise couldn’t. Placement rules that actually matter: opposite the window is the money spot (it becomes a second window); opposite the bed’s curtain track makes the sleep zone feel twice as deep; never opposite clutter, because a mirror doubles mess too. Size beats quantity — one 60×24-inch leaner floor mirror ($80–$150) does more than three small decorative mirrors that just add visual noise.
For renters, the move is to lean it: a full-length mirror tipped against the wall at a slight angle needs zero hardware, and the lean looks intentional, not lazy. Wall-mounting works too — heavy-duty adhesive strips hold up to about 20 lbs; beyond that, one nail into a stud is the honest answer (spackle it on move-out day).
Renter-friendly: yes — lean it or adhesive-mount. Budget: $40–$150 depending on size. Try it: prop your bathroom mirror opposite the studio window for one afternoon — the 4pm light difference will convince you before you spend a dollar.
19. The Living Plant Divider
Before: zones divided only by furniture feel hard-edged — shelf here, curtain there, everything a thing. After: a tall plant softens the boundary; the eye reads “garden edge” instead of “room divider,” and the air genuinely gets better.
One big plant beats six small ones in a studio — a single 4-to-5-foot plant has architectural presence, while six small pots read as clutter you’re watering. The best divider plants, ranked by forgiveness: snake plant (tall, sculptural, survives low light and outright neglect — my first choice for beginners), kentia palm (soft and feathery, tolerates medium light, no drama), or fiddle-leaf fig (the dramatic one — needs bright indirect light and consistency; I’ll be honest, it’s fussy and it knows it).
Put it in a tall planter on casters — a $15 rolling plant caddy — so your “wall” rolls wherever the boundary needs to be; between the sleep and live zones is the classic spot. Budget-wise, IKEA and Trader Joe’s beat nurseries by half on the plant itself.
Renter-friendly: completely. Budget: $50–$100 all in (plant $30–$60, pot + caddy $20–$40). Try it: start with the snake plant — if it’s thriving after three months (it will, it’s nearly unkillable), you’re ready for the fussy ones.
How to Make It Your Own: Studio Apartment Decor on Your Terms
Zoning is the skeleton — now give it your personality without breaking the calm. The trick is constraint: pick a 3-color palette (one neutral, one warm, one accent — mine is cream, oak, and sage), one metal finish (brass or black, not both), and repeat two textures throughout (boucle + linen, or jute + cotton). When every zone shares the same DNA, the whole studio reads as one intentional home instead of four furniture accidents.
Then add the things that make it yours: the gallery wall gets your photos, the open shelf gets the ceramics you actually use, the throw blanket is the one you reach for. A studio shows everything, so edit hard — if you don’t love it or use it weekly, it doesn’t earn floor space. And give yourself permission to rearrange quarterly. Studios are small enough that a full rezone takes an afternoon, and the second arrangement is almost always better than the first.
Studio Decor on Any Budget
Here’s the honest math on what a full studio apartment decor transformation costs at three levels. These assume you’re starting from an empty-ish rental and buying the big pieces — if you already own half of it, you’re living in the tier below.
| Tier | Budget | What it covers |
|---|---|---|
| The Refresh | ~$300 | Washable living-zone rug ($90), two warm lamps ($60), curtain track + panels for the bed ($75), bed risers + bins ($40), two lidded baskets ($35). The free layout tricks — floating the sofa, killing the overhead — do the rest. |
| The Makeover | ~$800 | Everything in Refresh, plus: daybed frame ($250), fold-down desk ($100), kitchen cart ($100), 4-cube bookshelf divider ($80), peel-and-stick wallpaper accent ($60), gallery wall frames ($40), plants + pots ($70). |
| The Full Reset | ~$1,500 | Everything in Makeover, plus: quality daybed mattress topper ($80), one great accent chair ($250), drop-leaf dining table ($180), large leaner mirror ($120), upgraded lighting with smart plugs ($60), layered textiles throughout ($120), art you actually chose ($90). |
My take: the Refresh tier transforms the feeling; the Makeover tier transforms the function. Do the Refresh first, live in it for two months, then spend Makeover money only on the zones that still annoy you daily. The Full Reset is for the studio you’ll live in for 3+ years — at that point, the per-day cost of a chair you love is pennies.
Try it: price your studio apartment decor Refresh tier tonight with real carts on IKEA and Target — it usually comes in $50 cheaper than you feared.
6 Studio Apartment Decor Mistakes to Avoid
1. Blocking the windows with your divider. The bookshelf divider goes perpendicular to the interior wall, never in front of the window. Natural light is a studio’s best asset — anything that dims it shrinks the room by half. Fix: keep all tall pieces on window-adjacent walls, not across from them.
2. Buying a “small” rug for each zone. Four tiny rugs chop the floor into confetti. Fix: fewer, bigger rugs — one 5×7 for living, one 4×6 for sleep — with breathing room between them.
3. One overhead light and nothing else. I covered this in idea #5, but it bears repeating because it’s the most common mistake: the boob light stays on, the zones never form. Fix: three lamps, warm bulbs, done.
4. Treating it like a dorm room. Futon, milk crates, string lights — fine at 19, depressing at 29. Fix: you don’t need expensive furniture, you need adult furniture: real bedding, a proper lamp, one piece of art you chose on purpose.
5. Buying storage before decluttering. A studio can’t store its way out of too much stuff — every bin you buy is floor space you lose. Fix: ruthless edit first (the one-year rule: unused in a year, it goes), then buy exactly the storage the survivors need.
6. Matching furniture sets. The 5-piece “apartment set” looks like a showroom and eats space with bulky proportions. Fix: mix one thrifted piece, one IKEA workhorse, one thing you love — collected beats matched every time in small spaces.
Studio Apartment Decor at a Glance
| Zone | Best Pick | When to Use It | Real Example |
|---|---|---|---|
| Room zoning | Float the sofa (#1) | Your bed is visible from the front door | Sofa back to the bed, 2–3 ft walkway behind |
| Room divider | Open bookshelf (#2) | Long narrow studio with no natural breaks | 4-cube open-back shelf, styled toward living side |
| Floor zoning | One rug per zone (#3) | Zones blur together visually | Flat-weave living rug + soft bedroom rug, same palette |
| Light + depth | Leaner mirror (#18) | Far wall is dark and flat | 60×24″ mirror leaned opposite the window |
| Soft zoning | Living plant divider (#19) | Zone edges feel hard and abrupt | 4–5 ft snake plant in a wheeled planter between zones |
FAQ About Studio Apartment Decor
How is studio apartment decor different from small apartment decor?
Small apartment decor works room by room — a small bedroom gets bedroom ideas, a tiny kitchen gets kitchen ideas. Studio apartment decor is fundamentally about zoning one open room into sleep, live, work, and eat areas using dividers, rugs, lighting, and multifunctional furniture. If your apartment has separate rooms with doors, you want small apartment ideas; if it’s all one space, you need studio zoning strategies like the ones in this guide.
How do I divide a studio apartment without building walls?
Use visual and physical dividers that don’t touch the structure: float the sofa with its back to the bed, stand an open bookshelf perpendicular to the wall, hang a ceiling curtain track around the sleep area, lay one rug per zone, and give each zone its own lamp. Together these create the feeling of separate rooms. None of them require drilling into walls if you use adhesive hooks and freestanding furniture.
What colors make a studio apartment look bigger?
Light, low-contrast palettes — warm whites, creams, oatmeal, soft sage, pale oak tones. The real trick isn’t just “light colors” but low contrast: when walls, bedding, rugs, and large furniture sit in the same tonal family, the eye reads the whole space as one continuous (larger) volume. Add depth with texture (boucle, linen, jute) instead of dark colors.
Can I decorate a studio apartment as a renter?
Absolutely — 17 of the 19 ideas in this guide need zero drilling or paint. The two exceptions (fold-down desk, wall shelf) both have freestanding or adhesive alternatives. Focus on furniture placement, rugs, lighting, curtains on tension rods or adhesive hooks, and removable adhesive strips for wall art. You can fully zone a studio without a single landlord negotiation. This is studio apartment decor working exactly as it should.
What is the best bed for a studio apartment?
A twin daybed with a trundle. It reads as a sofa by day (with throw pillows), sleeps you at night, and the trundle handles guests or hidden storage. If a daybed isn’t possible, push a standard bed long-side against the wall and style it with sofa-like pillows during the day. Add a 3-inch memory foam topper — daybed mattresses run thin. It’s the highest-impact choice in studio apartment decor.
How much should I budget for decorating a studio?
You can zone a studio well for $300–$600 total if you shop IKEA, Target, and secondhand: rugs ($120), lamps ($75), curtain track ($75), risers and bins ($50), baskets ($60), and paint-free wall art ($50). The layout tricks (floating the sofa, rearranging) are free. Spend first on lighting and rugs — they deliver the most transformation per dollar. For the full picture, see the Studio Decor on Any Budget section above, where I break it into three tiers: a ~$300 refresh, a ~$800 makeover, and a ~$1,500 full reset.
How do I make a studio apartment feel cozy instead of cramped?
Cramped comes from visual chaos; cozy comes from warm light, soft texture, and hidden clutter. Use 2700K warm bulbs in three lamp zones, layer textiles (throw blankets, cushions, rugs), keep one scent going (a candle or diffuser), and give every zone its lidded storage basket. In studio apartment decor, cozy is a lighting and texture decision, not a square-footage decision.
Also Read: 16 Small Apartment Decor Ideas for Every Tiny Room
Final Thoughts on Studio Apartment Decor
A studio asks something of you that bigger apartments don’t: intention. Every piece has to earn its place because there’s nowhere to hide the lazy choices. But here’s the payoff nobody tells you — a well-zoned studio is easier to live in than a badly arranged two-bedroom. Everything within reach, everything with a purpose, and at 10pm you draw one curtain and the whole day disappears behind it.
Start with the free stuff this weekend: float the sofa, kill the overhead light, tape out your rug zones. Then add the pieces one zone at a time. And when a friend walks in and asks “wait, where’s your bedroom?” — you’ll know your studio apartment decor zoning worked.

Founder of NestFlavors — sharing tested recipes and honest home ideas, made for real life.