
I ripped out two upper cabinets in my first kitchen and never looked back.
Kitchen shelves changed how my kitchen felt overnight — airier, brighter, and honestly more me. Below are 15 kitchen shelves ideas that actually work in real kitchens, plus the buying guide, weight-limit math, and styling rules I wish someone had handed me before I drilled my first hole.
Fair warning: this isn’t a gallery of pretty pictures with no substance. You’ll get exact measurements in inches, real cost breakdowns, and the weight calculations that keep your dishes off the floor. Whether you’re a renter who can’t drill or a homeowner planning a full shelf wall, there’s a path in here for you.
I’ve spent years testing open shelving in rentals and owned kitchens alike. Every measurement, bracket rule, and styling trick in this guide comes from that experience — not a showroom.
My first attempt was a disaster, honestly. I mounted a 4-foot pine board with the plastic anchors from the kit, loaded it with stoneware, and woke up to a crack at 2 a.m. that still makes my stomach drop thinking about it. The shelf survived; my favorite serving bowl didn’t. Everything in the weight and mounting sections below exists because I learned it the hard way, so you don’t have to.
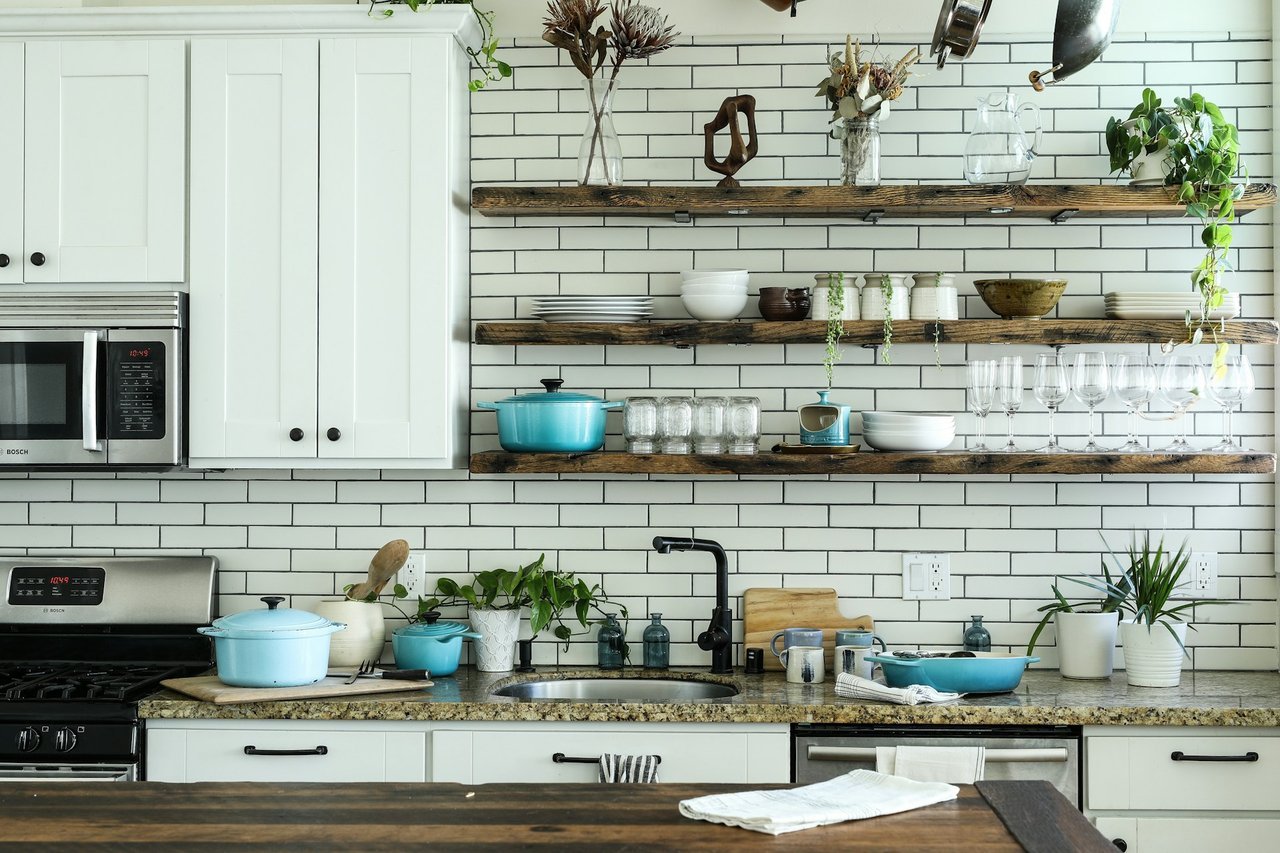
What Are Kitchen Shelves?
Kitchen shelves are open, doorless shelves mounted on kitchen walls that store and display dishes, glassware, cookbooks, and decor — a popular alternative to closed upper cabinets. Unlike cabinets, they keep everyday items visible and within reach, which makes the kitchen feel larger and more personal.
The most common types are floating shelves (hidden supports, no visible brackets), bracketed shelves (visible wood or metal brackets), and bracket-less ledge shelves. You’ll see them over the sink, flanking the range, or running along a blank wall where cabinets would have felt too heavy.
Open shelving has been cycling in and out of kitchen design for decades, but the current wave stuck because it solves a real problem: small kitchens and open floor plans where a wall of upper cabinets feels like a fortress. It also fits how we actually live now — cooking from our phones propped on the counter, grabbing the same five dishes on rotation, and wanting the kitchen to feel like part of the home rather than a workshop. When I poll readers, the number-one reason they switch is simple — their kitchen instantly feels bigger without moving a single wall.
Why You’ll Love Kitchen Shelves
- They make small kitchens feel bigger. Open shelves reflect light and let the wall breathe — closed cabinets can swallow a small kitchen whole.
- Everything is grab-and-go. Your morning mug, the olive oil, tonight’s dinner plates — no doors between you and what you need.
- They cost a fraction of cabinets. Two solid wood floating shelves run $60–$150 all-in; a single upper cabinet easily costs $300+.
- They’re endlessly restyle-able. Swap a vase for a plant, rearrange your stack of bowls — the shelf is a blank canvas you redecorate in minutes. Seasonal refreshes that used to mean a shopping trip now mean a ten-minute shuffle.
- They force a gentle declutter. When everything is visible, the chipped mug with the faded logo gets retired fast. Your shelves keep your kitchen honest — and an honest kitchen is a calmer one to cook in.
Floating Shelf Looks
Floating shelves are the cleanest, most modern way to do kitchen shelves — no visible hardware, just wood (or stone) floating on the wall. Here are five looks I keep coming back to.
1. The Single Long Line Over the Sink
Run one continuous shelf across the entire sink wall, aligned with the window trim. Keep it shallow — 8 to 10 inches deep — so it doesn’t crowd the faucet zone. I style mine with everyday glasses, two stacks of breakfast bowls, and one tall vessel for height.
Try it: paint the shelf the same color as the wall so the dishes become the art, not the wood. In a white kitchen, a white shelf with white dishes and one green plant is the minimalist look that never dates.
2. Chunky White-Oak Shelves With Visible Grain
Thick-cut white oak (2 to 3 inches thick) brings warmth to white kitchens instantly. The heavy profile reads like a design feature rather than a storage afterthought. Match the shelf thickness roughly to your countertop edge for a built-in look — that’s a designer trick the top kitchen blogs swear by.
Try it: leave the front edge raw or softly rounded; sharp square edges look harsh under kitchen lighting. A coat of matte polyurethane keeps the grain visible while shrugging off daily splashes.
3. Shelves Over a Full-Height Tile Backsplash
If your backsplash tile runs all the way to the ceiling, floating shelves on top of it look custom and high-end. The tile acts as a graphic backdrop that makes plain white dishes look intentional. Keep the shelf count to two and leave real breathing room between items.
Try it: install warm LED strip lighting under the top shelf — it bounces off the tile and turns the whole wall into a glow at night. Stick to 2700K warm white; anything cooler makes food look clinical.
4. Staggered Asymmetric Pair by the Range
Instead of mirror-image shelves flanking the stove, try two shelves staggered at different heights on one side. The asymmetry looks collected rather than catalog-bought. Keep them at least 30 inches above the cooktop so heat and grease don’t reach them (more on that in the mistakes section).
Try it: put cooking oils and spices on the lower shelf near your dominant hand — function first, styling second. I keep a small olive-wood spoon rest on my lower shelf too; it’s used daily and looks good doing nothing.
5. Stone or Quartz Shelf for a Seamless Look
A matching-stone shelf cut from the same slab as your countertop is the quiet luxury move. It’s heavy, so this one absolutely needs stud-mounted steel brackets — but the result looks like the countertop folded itself up the wall.
Try it: this works best as a single shelf over a slab backsplash ledge, holding nothing but three perfect objects. Yes, three objects on a $200 shelf feels extravagant — that’s exactly the point.
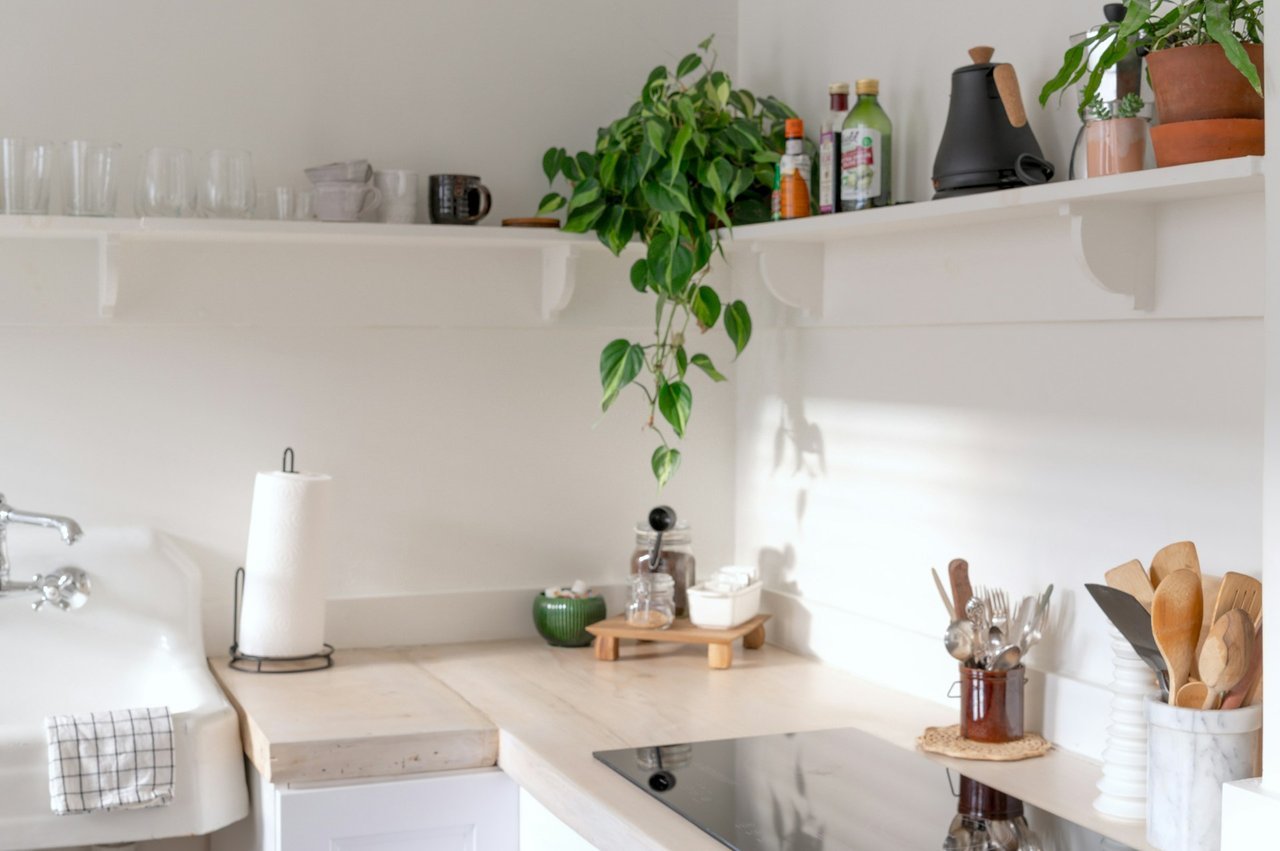
Styling and Display Ideas
Buying kitchen shelves is the easy part. Styling them so they look curated instead of cluttered is the real skill. These five approaches are the ones I use in my own kitchen.
6. The Dish-First Display
Build your shelf around the dishes you actually use daily — white porcelain, stoneware, or one accent color. Group like with like, stack plates in piles of 6 to 8, and stand one beautiful platter against the back wall for height (Ina Garten’s trick, and it works every time).
Try it: cap yourself at one color family plus one accent. Two palettes max, or the shelf reads as visual noise. My own palette is cream stoneware, clear glass, and one terracotta pot — it took three tries to land there.
7. The Glassware Zone
Clear glass is the secret weapon of shelf styling — it catches light and keeps the shelf feeling airy. Store everyday drinking glasses upside down to keep dust out, and group wine glasses by stem so they hang visually together.
Try it: mix in two or three pieces of colored glass (blue water glasses, amber tumblers) as accents against all that clear. Colored glass is dirt-cheap at thrift stores, which makes it the lowest-risk way to experiment.
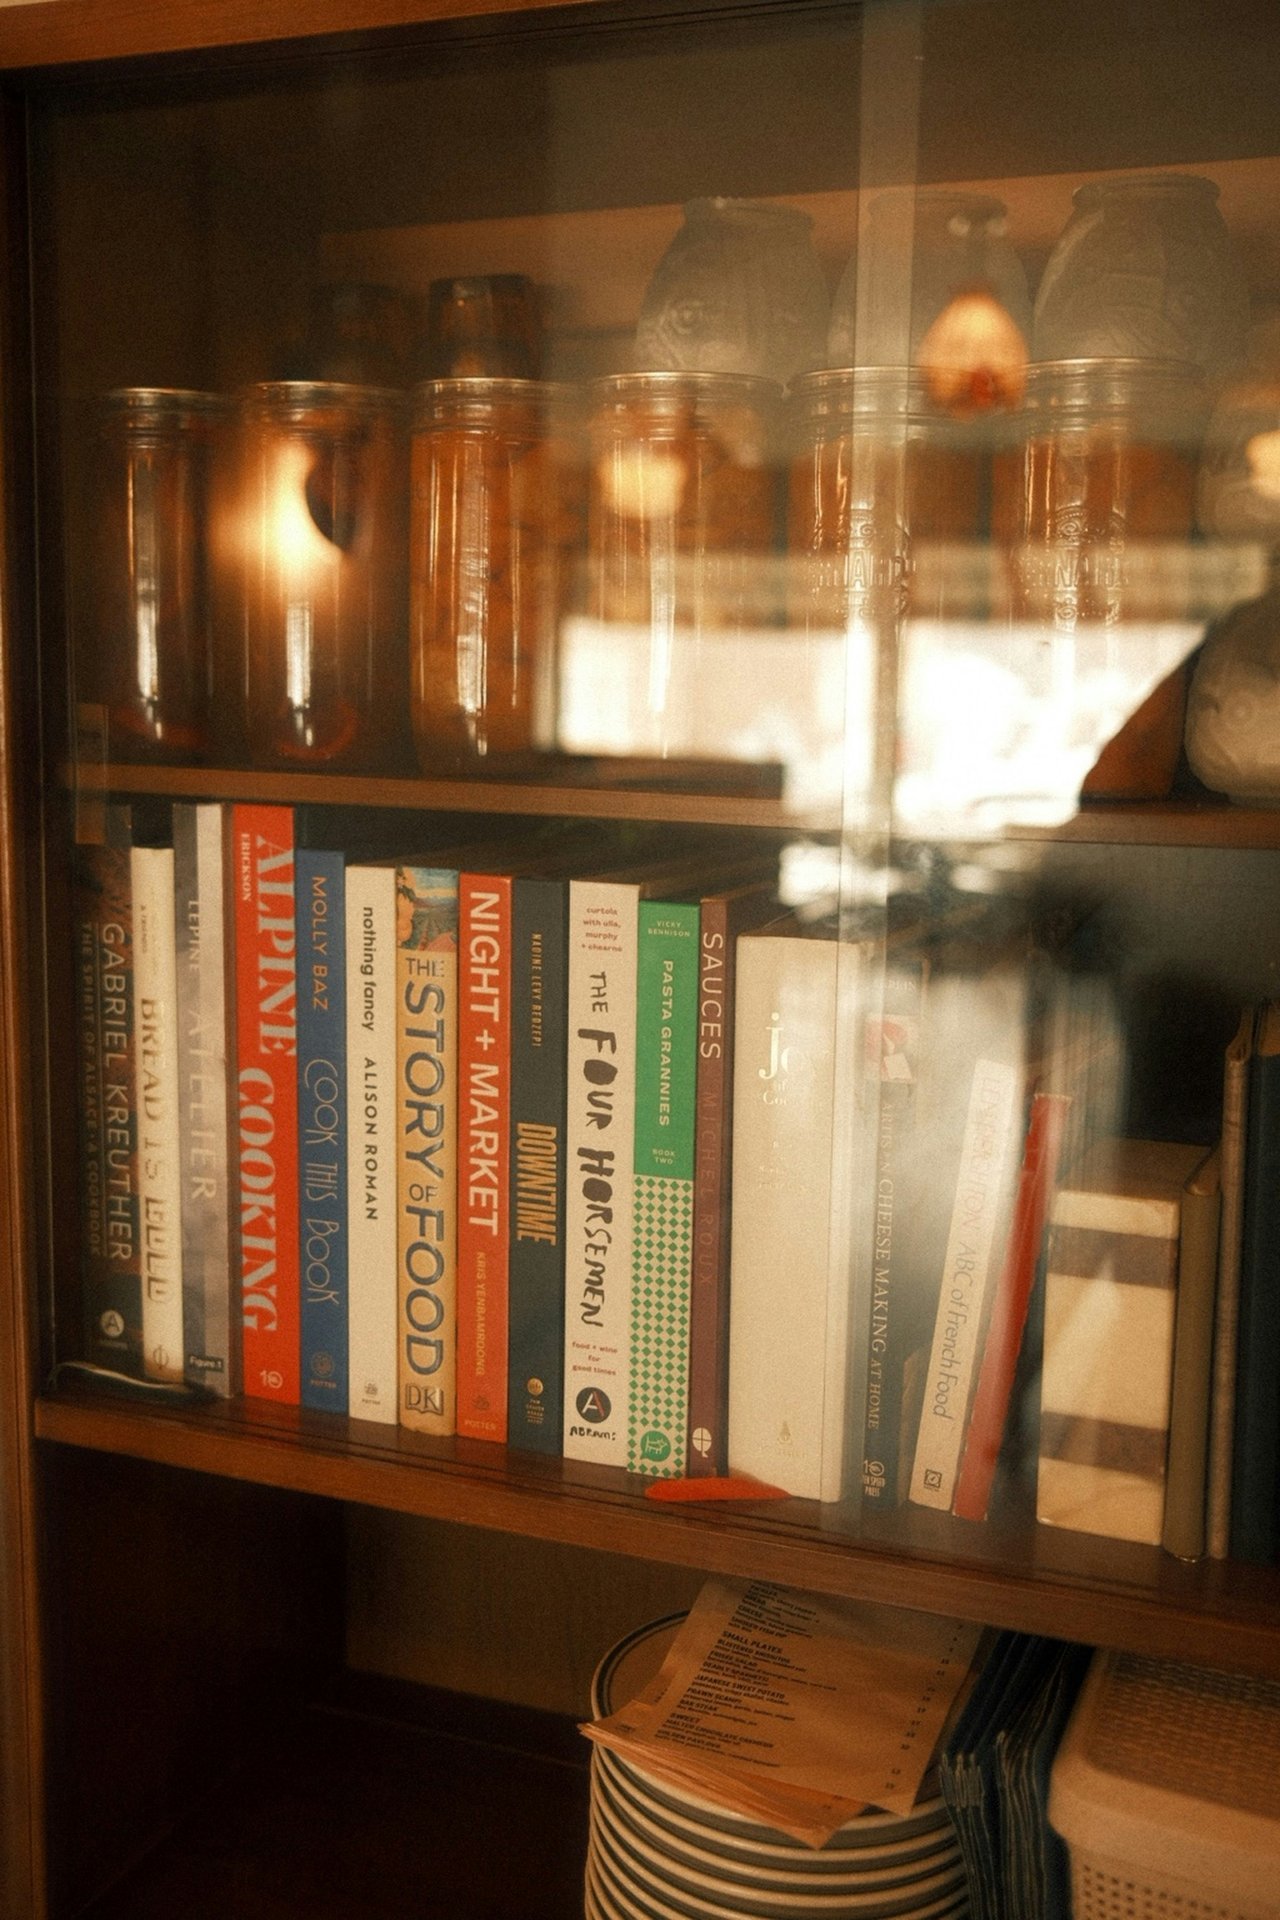
8. Cookbooks + Greenery Combo
One stack of cookbooks laid horizontally anchors a shelf like nothing else, and a trailing pothos or small herb pot softens all the hard edges. The rule of threes applies here: three books, one plant, one small object.
Try it: cookbooks you never open are clutter — keep only the ones with sauce splatters on them. A bookend isn’t necessary if the stack is four or more; the weight holds itself steady.
9. The Corner Shelf Nook
Dead corner above the counter? A small L-shaped or corner shelf turns it into the busiest, best-looking spot in the kitchen. This is where your coffee station or tea setup lives — mugs on hooks underneath, beans and sugar on top.
Try it: add a brass rail under the shelf and hang three mugs from S-hooks. Instant café energy. Hang the mugs you actually drink from — the chipped souvenir mug can live in the cabinet.
10. The Everyday-Only Edit
The most honest styling rule I’ve found: if it lives on the shelf, you must touch it weekly. Everyday plates, glasses, oils, salt — the things with dust-proof turnover. Anything decorative earns its place by being useful or genuinely loved.
Try it: once a month, pull everything off one shelf and only put back what you’d miss. It’s a five-minute reset. I do mine on the first Sunday of the month, coffee in hand — it never takes more than ten minutes.
Practical and Small-Kitchen Shelves
Not every kitchen can take the full floating-shelf treatment. These five ideas solve real problems — rentals, tiny footprints, and tight budgets.
11. The Renter-Friendly Countertop Shelf
Can’t drill? A vertical counter-standing shelf unit gives you the open-shelf look with zero holes. It holds spices, oils, and small appliances at counter level and lifts them off your limited counter space. When you move, it moves with you.
Try it: choose one with a narrow 6-inch depth so it doesn’t eat your prep space. Look for a small rail or lip on each tier — things slide off narrow shelves otherwise.
12. Under-Cabinet Mini Shelf
Screw a shallow 4-to-6-inch shelf under an existing cabinet to hold mugs, spice jars, or cutting boards. You get new storage in space that was literally empty air, and from most angles it’s invisible.
Try it: mount S-hooks to the front edge for utensils or measuring cups — bonus hanging storage for free. This is also the best spot for the spices you reach for mid-cook, since it sits right in the work zone.
13. The Above-Sink Single Shelf
In a small kitchen, one shelf above the sink is the highest-impact move you can make. It holds the five things you reach for constantly — hand soap, dish brush, two glasses, a small plant — and costs almost nothing.
Try it: use a shelf with a raised back lip if you keep bottles up there; sink splashes are real. Mount it about 20 inches above the faucet — high enough to clear the tallest pot you wash.
14. Leaning Ladder Shelf in a Corner
A leaning ladder shelf needs just two small wall anchors (or none, if it’s stable on its own) and gives you four or five graduated shelves. The deep bottom holds the stand mixer; the narrow top holds a plant. Perfect for kitchens where wall space is oddly shaped.
Try it: anchor it to the wall even if it feels stable — a loaded ladder shelf tipping forward is nobody’s idea of fun. Two small L-brackets into a stud at the top rail are invisible and make it rock-solid.
15. Open Shelf + Closed Cabinet Mix
The smartest kitchens I’ve seen don’t go all-open. They keep closed cabinets for the ugly stuff (plastic containers, cleaning supplies, the blender) and put shelves on one wall for the pretty everyday things. You get the airy look without the pressure of a perfect pantry.
Try it: designate shelves as “display storage” and cabinets as “real storage” — then stop apologizing for the cabinets. Guests will compliment the shelves and never once ask what’s behind the cabinet doors. I promise.
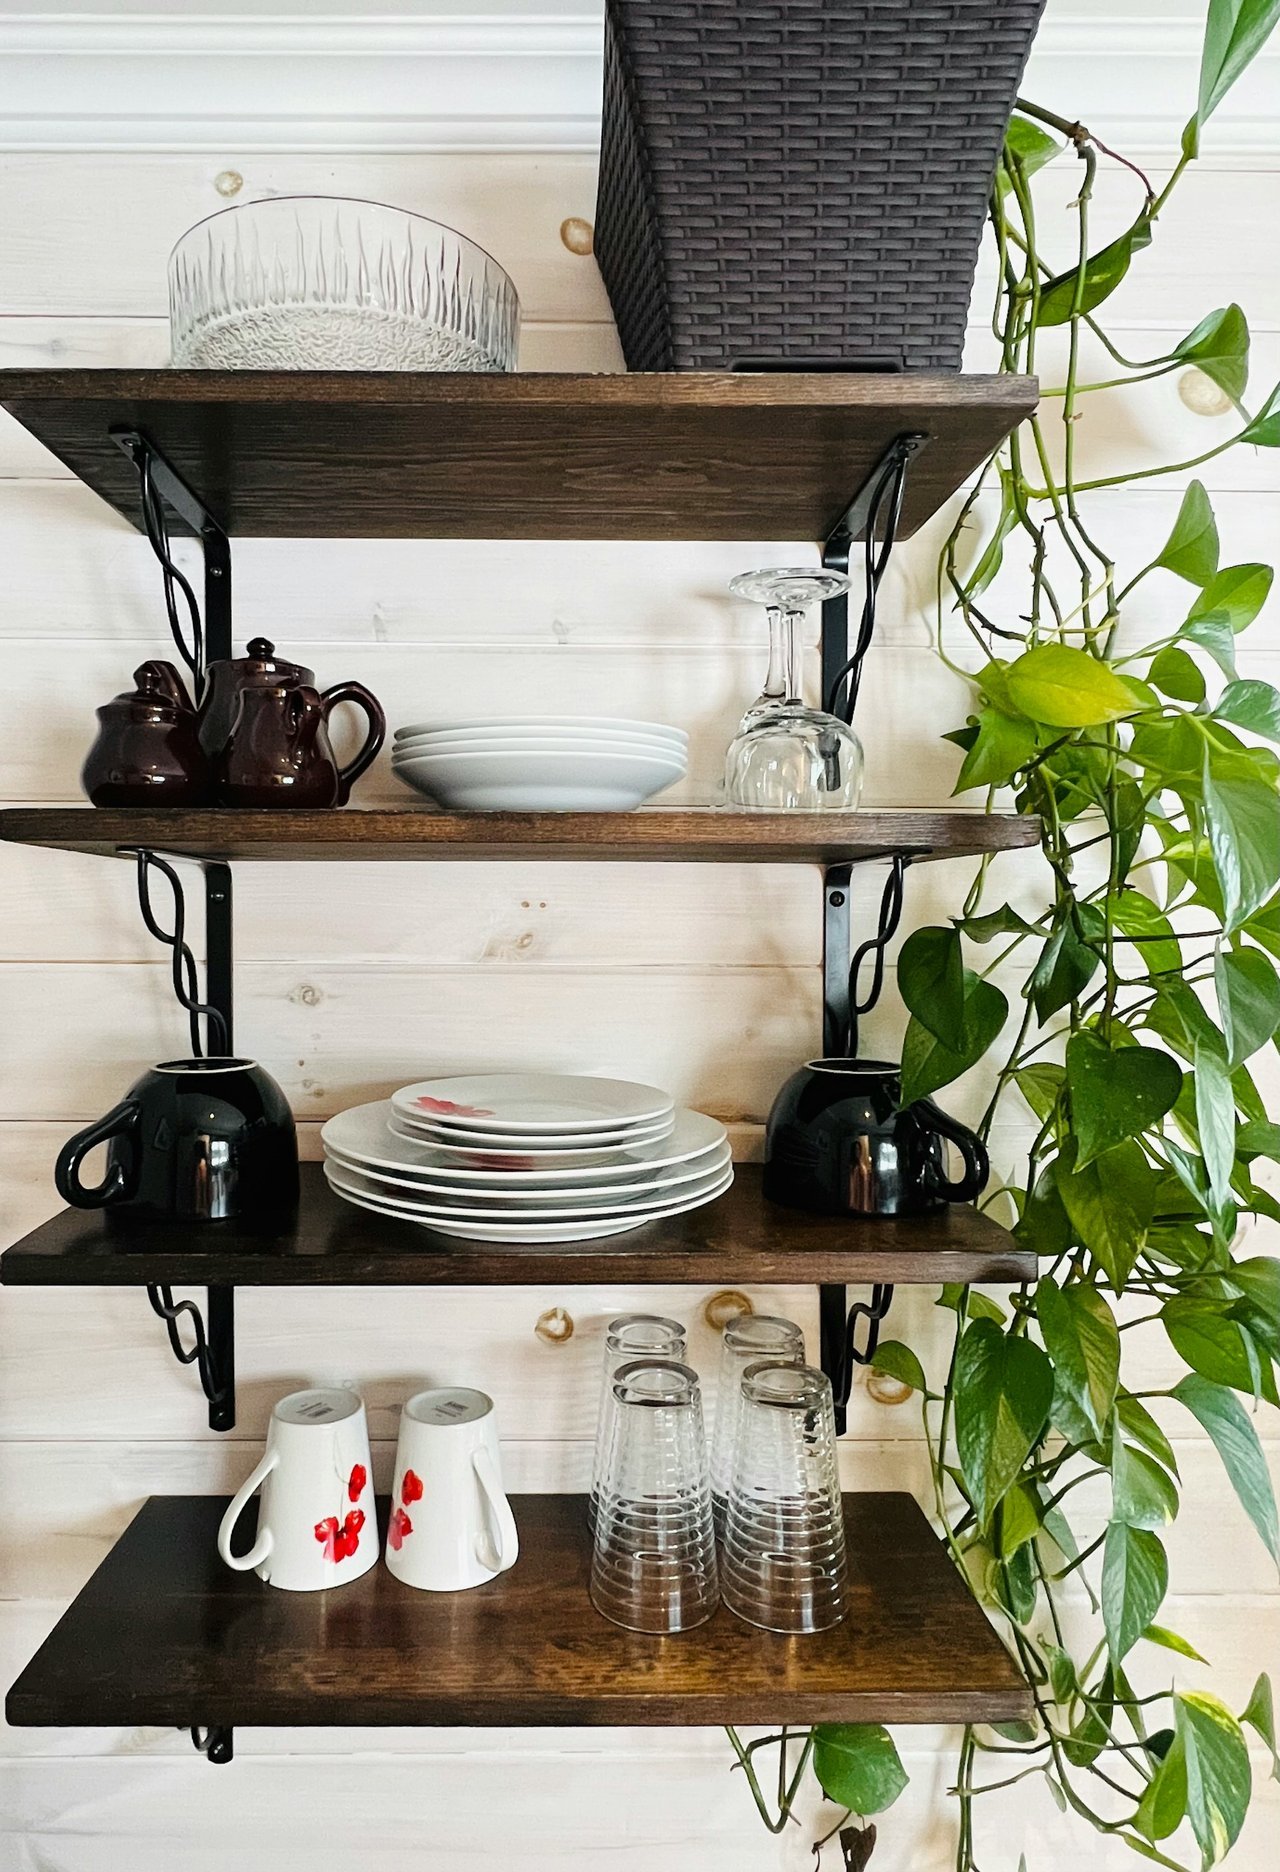
Shelf Styling Formulas That Never Fail
Staring at an empty shelf is paralyzing. These four formulas are the ones professional stylists actually use — steal them shamelessly.
The triangle. Arrange objects so their heights form a triangle: tallest in the middle or at one end, stepping down on either side. A tall vase, a medium stack of bowls, a small candle. Your eye reads the triangle as intentional every single time.
The rule of thirds. Mentally divide the shelf into thirds. Fill two thirds with useful items (dishes, glasses, jars) and leave one third open or lightly styled with a plant or art. The empty third is what makes the shelf look designed instead of stuffed.
Anchor, layer, breathe. Every shelf needs an anchor (something heavy and tall at one end — a cookbook stack, a big pitcher), layering in front of it (small jars or a leaning frame in front of larger pieces), and breathing room (at least a few inches of empty space somewhere). Anchor, layer, breathe — say it while you style.
Odd numbers win. Three mugs, five jars, one plant. Odd groupings look collected; even groupings look like a store display. This sounds like superstition until you try it side by side — then it sounds like physics.
One more honest tip: style with what you own before buying anything. Pull candidate items from around the house, live with the arrangement for two days, and only then fill the gaps with a purchase. Half of my “shelf decor” budget went unspent once I started doing this.
Floating vs. Bracketed: Buying Guide
This is the first decision every buyer faces, so let’s settle it. Floating shelves hide their supports inside the shelf for a clean, modern look. Bracketed shelves use visible L-brackets, corbels, or industrial pipe — cheaper, stronger, and easier to install, with a farmhouse or industrial vibe.
| Feature | Floating Shelves | Bracketed Shelves |
|---|---|---|
| Look | Clean, modern, “invisible” | Farmhouse, industrial, crafted |
| Typical cost (36″ shelf) | $40–$90 | $20–$50 |
| Weight capacity | 15–25 lbs per foot (stud-mounted) | 30–50 lbs per foot |
| Install difficulty | Harder — must hit studs, must be level | Easier — brackets forgive small errors |
| Best wood | White oak, walnut, butcher block | Pine, reclaimed wood, metal |
| Best depth | 8–12 inches | 8–12 inches |
| Renter-friendly? | No (needs serious anchors) | Somewhat (fewer, smaller holes) |
| Holds heavy dishes? | Only with steel hidden brackets | Yes — brackets carry the load |
My honest take: if you’re storing stacks of ceramic dinner plates and cast iron, bracketed wins. If you’re styling glasses, bowls, and decor, floating is worth the extra install effort.
Material matters as much as mounting. Solid hardwoods (white oak, walnut, maple butcher block) hold the most weight and age beautifully. Engineered or hollow-core floating shelves are lighter and cheaper but cap out fast — check their per-foot rating before loading them with stoneware. Metal shelves (stainless or powder-coated steel) are the strongest per inch and wipe clean, which is why commercial kitchens use them; they just read more industrial. Glass shelves look weightless and are great for display-only setups, but they show every fingerprint and hold the least.
What to check before you buy: shelf thickness (1.75 inches minimum for floating; thinner sags), included hardware (cheap kits include drywall-only anchors — throw them out), whether the bracket rods reach at least two-thirds of the shelf depth, and the finish (a sealed or polyurethane-coated shelf survives kitchen humidity; raw wood doesn’t).
Where to buy. Big-box stores carry decent bracketed kits for under $50, and they’re fine for light loads. For floating shelves, I buy from specialty wood shops — the bracket quality is in a different league, and most will cut to your exact length. Etsy sellers are great for reclaimed-wood character pieces; just confirm the board is kiln-dried and flat before it ships. Whatever the source, read the weight rating in the listing, not the reviews — reviewers rarely load shelves the way a real kitchen does.
What Do Kitchen Shelves Actually Cost?
Nobody talks numbers, so let’s talk numbers. Here’s what a typical 6-foot run of shelving costs in the US, all-in, based on what I’ve actually paid:
| Setup | Materials | Hardware | Total (6 ft) |
|---|---|---|---|
| DIY pine + L-brackets | $25–$40 | $15–$25 | $40–$65 |
| Butcher block + black brackets | $60–$100 | $25–$40 | $85–$140 |
| White oak floating (2 shelves) | $120–$200 | $60–$100 (hidden brackets) | $180–$300 |
| Stone/quartz single shelf | $200–$400 (fabrication) | $50–$80 | $250–$480 |
Compare that to stock upper cabinets at $150–$400 per linear foot installed — a 6-foot cabinet run easily tops $1,500. Even the premium white-oak floating setup costs less than a fifth of cabinets. That’s why shelves are the go-to move in budget kitchen refreshes: the visual impact per dollar is unmatched.
Don’t forget the hidden costs, though. A decent stud finder ($15–$30), a 4-foot level ($20), and the right drill bits if you don’t own them. And if you’re hiring the install out, budget $100–$200 for a handyman to mount two shelves properly — worth it if drilling into tile makes you nervous.
Mounting Height and Spacing Rules
Measurements matter more than styling. Get these wrong and the prettiest shelf in the world is a daily annoyance.
- Bottom shelf above the counter: 18 to 24 inches. Eighteen is the standard clearance — enough for a coffee maker underneath; 20 to 24 gives taller appliances room.
- Between stacked shelves: 12 to 18 inches, measured from the top of the lower shelf. Twelve inches fits plates and glasses; 15 to 18 fits cookbooks and taller vessels. Measure your tallest item first, then add 2 inches.
- Shelf depth: 8 to 12 inches. Eight inches holds glasses and spices; 10 to 12 holds dinner plates (most are 10 to 11 inches across). Deeper than 12 inches and you lose the airy look — plus things get lost in back.
- Shelf length: under 48 inches per span if you only have two supports. Longer runs need a third bracket or sag in the middle within a year. Studs are 16 inches apart in most US walls, so plan your lengths around that grid.
- Distance from the range: at least 30 inches above the cooktop, and honestly I’d skip shelves directly over the stove entirely. Grease coats everything within a two-foot radius — I learned this the greasy way.
Weight Limits: The Math Nobody Shows You
Here’s the content gap almost every kitchen shelf article skips: the actual weight math. And it’s the thing that prevents your dishes from ending up on the floor.
Do the dish math first. A single ceramic dinner plate weighs 1.5 to 2 pounds. A stack of 8 is 12 to 16 pounds — before the shelf itself. A 36-inch white-oak shelf weighs 8 to 12 pounds empty. Add glasses, bowls, and a jar of flour, and a fully loaded 3-foot shelf easily tops 40 pounds.
Know your per-foot rating. Most floating-shelf manufacturers rate their shelves at 15 to 25 pounds per foot when mounted into studs. A 3-foot shelf at 20 lbs/ft = 60 pounds total capacity — which sounds generous until you subtract the shelf’s own 10 pounds and realize your “60-pound” shelf holds 50 pounds of dishes. Always read the manufacturer’s spec sheet, and always assume the conservative end.
Studs are everything. Drywall alone holds almost nothing — standard anchors pull out at 10 to 20 pounds each. A shelf rated for 60 pounds in studs becomes a 20-pound shelf on drywall anchors, no matter what the box says. Use a stud finder, mark both edges of the stud (they’re 1.5 inches wide), and drive your screws or lag bolts into the center. No studs where you want the shelf? Toggle bolts are the only drywall anchor I’d trust, and I’d still halve the rated load.
The sag rule. Any shelf spanning more than 36 inches without center support will sag over time, even in hardwood. Add a third bracket at the midpoint for spans over 3 feet — hidden brackets can be notched in without ruining the floating look.
A worked example. Say you’re mounting a 36-inch white-oak floating shelf rated at 20 lbs/ft into studs. Total capacity: 60 lbs. Subtract the shelf itself (10 lbs) → 50 lbs usable. Now load it: 8 dinner plates (14 lbs) + 6 bowls (6 lbs) + 4 glasses (3 lbs) + 2 storage jars of flour and sugar (8 lbs) + a small plant (3 lbs) = 34 lbs. You’re comfortably under. Add a cast-iron Dutch oven (13 lbs) and you’re at 47 — still fine, but now you see why the math matters before the brackets go up.
I once overloaded a 48-inch pine shelf with nothing but cookbooks. It bowed a full inch in six months. The brackets held; the wood didn’t. Respect the span, not just the brackets.
Common Mistakes to Avoid
- Mounting over the stove. Heat warps wood, melts candle wax, and grease coats every dish with a sticky film. Fix: keep shelves at least 30 inches above the cooktop — or skip that wall entirely and use the space beside the range instead.
- Skipping the stud finder. Drywall anchors are not a substitute for studs on loaded kitchen shelves. Fix: if you can’t find a stud, move the shelf — don’t upgrade the anchor. A $15 stud finder saves a $150 shelf of broken dishes.
- Spacing shelves too tightly. Twelve inches feels generous until your tallest vase doesn’t fit. Fix: measure the tallest item going on the shelf, add 2 inches, and then mark your holes. Cardboard templates taped to the wall let you preview spacing before you drill.
- Going too deep. A 14-inch-deep shelf swallows light and collects dead zones in back. Fix: for most kitchens, 10 inches is the sweet spot — plates fit, clutter doesn’t hide, and you can reach everything without a step stool.
- Styling only, never using. Shelves full of decor you never touch become dust museums. Fix: put your daily dishes up there and keep decor to 20 percent — the “touch it weekly” rule from idea #10. If it hasn’t moved in a month, it doesn’t belong on the shelf.
- Forgetting the dust factor. Open shelves collect dust — that’s the trade. Fix: wipe shelves and rarely-used pieces every two to three weeks; keep a microfiber cloth in a nearby drawer so it’s a 30-second job, not a project. Glass stored upside down and frequently-used dishes need almost no maintenance.
- Mixing wood tones randomly. One shelf in walnut, another in gray-washed pine, brackets in black — it reads as accidental. Fix: pick one wood tone and one metal finish and repeat them across every shelf in the room. Repetition is what makes mismatched objects look like a collection.
Kitchen Shelves at a Glance
| Topic | The Short Version |
|---|---|
| Best depth | 8–12 inches (10″ is the sweet spot) |
| Shelf spacing | 12–18 inches apart, measured from shelf top |
| Height above counter | 18–24 inches |
| Floating capacity | 15–25 lbs/ft when stud-mounted |
| Bracketed capacity | 30–50 lbs/ft |
| Max span without center support | 36–48 inches (add a third bracket beyond 36″) |
| Distance from cooktop | 30+ inches (or skip the stove wall) |
| Best woods | White oak, walnut, butcher block |
| Budget per 36″ shelf | $20–$50 bracketed / $40–$90 floating |
| Renter-friendly pick | Countertop standing shelf — zero holes |
| Cleaning cadence | Wipe every 2–3 weeks; daily-use dishes self-maintain |
| Styling rule | 80% useful, 20% decor; one color family + one accent |
FAQ
Are kitchen shelves better than cabinets?
Neither is universally better — they solve different problems. Kitchen shelves make small kitchens feel larger, cost far less than upper cabinets, and keep everyday items within instant reach. Cabinets win for hiding clutter, protecting dishes from dust and grease, and storing heavy or rarely-used items. The best kitchens I’ve seen use both: shelves for daily dishes and beauty, cabinets for everything else. If you’re renovating, try living with one open shelf for a month before committing to a full wall — you’ll learn your real habits fast.
How much weight can kitchen shelves hold?
It depends on the shelf type and installation. Stud-mounted floating shelves typically hold 15 to 25 pounds per linear foot; bracketed shelves hold 30 to 50 pounds per foot. Always subtract the shelf’s own weight first, and never trust drywall-only anchors for loaded shelves — find the studs. Check the manufacturer’s spec sheet for your exact shelf, and when in doubt, assume the lower end of the range.
What is the best depth for kitchen shelves?
Eight to 12 inches. Eight inches is plenty for glasses, spices, and mugs; 10 to 12 inches fits standard dinner plates (10 to 11 inches across). I recommend 10 inches as the all-rounder — deep enough for real dishes, shallow enough to keep the open, airy look. Measure your largest dinner plate before ordering; oversized chargers and pasta bowls are the usual surprise.
How far apart should kitchen shelves be?
Twelve to 18 inches apart, measured from the top surface of the lower shelf. Twelve inches fits plates, bowls, and glasses; 15 to 18 inches accommodates cookbooks and taller vessels. Measure your tallest item, add 2 inches of clearance, and mark your mounting holes from there. When stacking three shelves, I make the bottom gap the tallest (everyday dishes) and the top gap the shortest (decor and rarely-used pieces).
Do open kitchen shelves get dusty?
Yes — that’s the honest trade-off. Shelves and rarely-handled items need a wipe every two to three weeks. But dishes you use daily essentially self-clean through turnover, and glasses stored upside down stay dust-free inside. If dusting sounds miserable, keep shelves to daily-use items only and skip the pure decor. Kitchens near busy roads or with forced-air heat collect dust faster, so adjust your cadence to your home.
Can you put kitchen shelves above the stove?
I don’t recommend it. Heat can warp wood shelves, and airborne grease coats everything within about two feet of the cooktop with a sticky film that’s miserable to clean. If you must, use metal or stone shelves, mount them at least 30 inches above the cooktop, and expect to wipe them weekly. A stainless shelf with a small lip is the only version of this I’d personally install — and even then, I’d rather have the shelf on the adjacent wall.
Are floating shelves strong enough for dishes?
Yes, when they’re mounted into studs with quality hidden brackets. A 3-foot stud-mounted floating shelf rated at 20 pounds per foot holds 60 pounds total — enough for a stack of plates, bowls, and glasses. The failures I hear about are almost always drywall-anchor installs or spans over 36 inches without center support, not the floating design itself. Look for hidden brackets with a steel back plate and support rods at least two-thirds as deep as the shelf.
What’s the best wood for kitchen shelves?
White oak is my top pick — hard, beautiful grain, and it takes finish well. Walnut is the premium choice for a rich, dark look. Butcher block (maple) is the budget-friendly workhorse. Avoid soft pine for long spans; it sags. Whatever you choose, seal it with a food-safe finish or polyurethane — kitchen shelves take splashes. Reclaimed wood looks fantastic but check it for flatness first; twisted boards never sit level no matter how good the brackets are.
Final Thoughts
Kitchen shelves are one of those rare upgrades that cost little, install in an afternoon, and change how your whole kitchen feels. Start with one shelf — over the sink, by the coffee maker, wherever you reach most — and live with it for a month before you commit to a whole wall. You’ll learn whether you’re a daily-dishes person or a styled-display person, and that answer shapes every shelf after it.
Measure twice, find the studs, and put your everyday dishes where you can actually enjoy looking at them. That’s the whole philosophy. Happy shelving — and send me a photo when yours are up. I genuinely love seeing them.

Founder of NestFlavors — sharing tested recipes and honest home ideas, made for real life.