

The first time I tried meal prepping, I spent four hours in the kitchen and threw half of it away by Thursday. That’s the reason most beginners quit after one week.
Here’s what I wish someone had told me: learning how to start meal prepping has almost nothing to do with cooking skill and everything to do with having a system. You don’t need seven recipes. You don’t need a full day. You need about two hours, a few good containers, and a plan simple enough that you’ll actually repeat it next Sunday.
This guide is the beginner system I landed on after years of trial and error — the 5-step weekly method I still use, the containers worth buying, a sample 5-day plan with five easy starter recipes, the food safety rules that keep everything fresh, and the mistakes I made so you don’t have to. Let’s get your week sorted.
What Is Meal Prepping?
Meal prepping is the practice of cooking food in batches — or prepping individual ingredients — ahead of time, then portioning everything into ready-to-eat meals for the days ahead.
In plain terms: instead of cooking from scratch every night, you spend one focused session (usually 1–2 hours on a weekend) doing your batch cooking, ingredient prep, and portioning all at once. The payoff is a fridge full of grab-and-go breakfasts, lunches, and dinners — plus freezer meals for the days you don’t feel like cooking at all. Some people prep complete portioned meals; others just wash, chop, and cook the building blocks. Both count, and the 5-step system in this guide works for either style.
Why Meal Prep Actually Works (It’s Not What You Think)
Most people think meal prepping is about cooking more. It’s actually about deciding less. The average person makes over 200 food decisions a day, and by 6 p.m. your decision-making battery is dead — which is exactly when the takeout apps start looking irresistible.
When lunch is already in the fridge, there’s nothing to decide — you just eat. That’s the whole magic trick, and the benefits stack up fast:
- You save real money. One week of prepped lunches costs me roughly what two takeout orders cost. The math isn’t close.
- You eat better without trying. When the healthy option is the easiest option, you don’t need willpower.
- Weeknights get their evenings back. No 45-minute “what’s for dinner” spiral. Dinner is already done.
- Less food waste. You buy with a plan, cook with a plan, and eat with a plan. The sad wilted spinach era ends here.
The catch? All of this only works if the system is simple enough to survive a busy week. Complicated systems die by Wednesday. So we’re keeping this dead simple.
What You Really Need to Start (Spoiler: Not Much)
You do not need a $200 container set, a vacuum sealer, or a second fridge. Here’s what actually matters, in order of importance:
Meal prep containers (the only real investment). Get 8–10 airtight containers in a uniform size — the 3-cup rectangular ones are the sweet spot for lunches and dinners. Glass is my pick: it doesn’t stain, doesn’t warp in the microwave, and you can see what’s inside (which means you’ll actually eat it). Look for BPA-free lids with locking clips. Mason jars are great for overnight oats and salads.
What you already own. A sheet pan, a large pot, a skillet, a sharp knife, and a cutting board cover 90% of meal prep cooking. A slow cooker or Instant Pot is a nice bonus for set-and-forget proteins, but it’s optional — I prepped for a full year without one.
Nice-to-haves (add later). A rice cooker, a food scale, and small 2-oz sauce cups for dressings.
The #1 beginner mistake with gear: Buying everything before cooking anything. Start with whatever containers you have — even mismatched ones — and upgrade after three weeks once you know your actual routine. The system comes first; the gear follows.

The 5-Step Weekly Meal Prep System
This is my no-stress system for how to start meal prepping. Five steps, about two hours on a Sunday (or whatever day works), and you’re set for the week. I’ve refined this over dozens of weeks — it survives busy schedules because every step is designed to be boring and repeatable.
Step 1: Pick One Meal to Start
Do not prep breakfast, lunch, dinner, and snacks in week one. That’s how you end up crying into a pile of Tupperware at 9 p.m. on a Sunday.
Pick ONE meal — the one that currently causes you the most stress or costs you the most money. For most people, that’s lunch (the $15 salad era) or dinner (the takeout spiral). Prep just that meal, for 4–5 days. Master it for two or three weeks, then add a second meal if you want. Wondering how to start meal prepping without burning out? This is it — one meal at a time.
Starting small isn’t being lazy. It’s being strategic. A simple system you repeat beats an ambitious one you abandon.
Step 2: Choose Your Components, Not Your Recipes
Here’s the mindset shift that changed everything for me: prep components, not finished meals. Instead of cooking five different complete recipes, cook a small set of building blocks and mix them into different combinations all week.
The formula I use every single week:
- 2 proteins (e.g., grilled chicken + hard-boiled eggs, or ground turkey + chickpeas)
- 2 grains or starches (e.g., brown rice + roasted sweet potatoes)
- 3 vegetables (e.g., roasted broccoli, shredded carrots, cucumber)
- 2 sauces or dressings (e.g., peanut sauce + lemon-tahini — this is what keeps it from getting boring)
That’s it. Two proteins times two grains times three vegetables times two sauces gives you dozens of different bowls from one prep session. Variety comes from the combinations, not from cooking more things.
The #1 beginner mistake: Cooking five totally different recipes with five totally different ingredient lists. Your grocery bill doubles, your prep time triples, and by Wednesday you’re eating cereal because you’re too tired to reheat the thing you made.
Step 3: Shop With a Plan
Write your list from your components, not the other way around. Check your fridge and pantry first — you’d be amazed how many “I need groceries” moments are actually “I need three things” moments.
My weekly shop for the component system above looks something like this: chicken breasts, eggs, brown rice, sweet potatoes, broccoli, carrots, cucumber, peanut butter, tahini, lemons, plus the spices and oils I already own. One trip, one bag or two, done in 30 minutes.
Pro tip: Shop the same day you prep, or the night before. A fridge full of good intentions that sits for three days before you cook is how produce goes to die.
Step 4: The 2-Hour Power Session
This is the actual batch cooking session, and the order matters. The golden rule: start with whatever takes the longest, then use the waiting time for everything else.
Here’s how a typical session flows for me:
- 0:00 — Oven to 425°F. Get grains going (rice cooker on, or pot on the stove). Put eggs on to boil.
- 0:10 — Season chicken and get it in the oven. Chop vegetables while it roasts.
- 0:25 — Vegetables join the oven on a second sheet pan. Flip the chicken.
- 0:35 — Chicken rests. Whisk together your two sauces. Portion grains into containers.
- 0:50 — Everything’s out of the oven and cooling. Slice chicken, divide proteins and veg into containers.
- 1:00–1:30 — Portion, label, clean as you go. Done.
The whole thing takes 90 minutes to 2 hours once you’ve done it twice. Put on a podcast. It’s genuinely pleasant once the system clicks.
The #1 beginner mistake: Starting with the fiddly stuff. If you chop all your vegetables first and then realize the rice takes 45 minutes, you’ve just added 45 dead minutes to your session. Longest-cooking item goes first, always.
Step 5: Store, Label, and Eat
Let food cool for 20–30 minutes before sealing containers — sealing steaming-hot food traps condensation and makes everything soggy. (Don’t leave it out longer than 2 hours, though — that’s a food safety rule, and I’ll cover it properly below.)
Label everything with what’s inside and the date you made it. A strip of masking tape and a marker is all you need.
Keep sauces and dressings in separate small containers and add them at mealtime. This single habit is the difference between “still good on Thursday” and “soggy sadness by Tuesday.”
A Sample 5-Day Starter Plan (With 5 Easy Recipes)
Theory is nice, but let’s make it concrete. Here’s a full 5-day plan built on the component system — a practical example of how to start meal prepping this weekend. Five easy recipes that share ingredients, reheat well, and take about 90 minutes to prep together: overnight oats for breakfasts, and rotating bowls for lunches built from sheet pan chicken, turkey taco meat, chickpeas, rice, and roasted veg.
Recipe 1: Peanut Butter Overnight Oats (5 breakfasts, 10 minutes)
Why it works for meal prep: Zero cooking, endlessly customizable, and it actually improves overnight as the oats absorb the milk. This is the easiest win in all of meal prepping.
Ingredients (makes 5 jars):
– 2 1/2 cups old-fashioned rolled oats
– 2 1/2 cups milk (dairy or oat milk)
– 5 tbsp peanut butter
– 5 tbsp maple syrup or honey
– 2 1/2 tsp chia seeds
– 1 tsp vanilla extract
– Pinch of salt
– Toppings: sliced banana, berries, or a handful of granola (add morning-of)
Steps:
1. Divide the oats, milk, peanut butter, maple syrup, chia seeds, vanilla, and salt evenly among 5 mason jars or containers.
2. Stir each one well — make sure the peanut butter is fully mixed in, not sitting in a blob at the bottom.
3. Seal and refrigerate overnight (or up to 5 days). Add fresh toppings in the morning.
Time: 10 min | No cooking | Keeps 5 days refrigerated
My take: The chia seeds are doing quiet work here — they thicken the oats into a pudding-like texture by morning. Don’t skip them.
Peanut Butter Overnight Oats
Ingredients
Method
- Divide the oats, milk, peanut butter, maple syrup, chia seeds, vanilla, and salt evenly among 5 mason jars or containers.
- Stir each one well — make sure the peanut butter is fully mixed in, not sitting in a blob at the bottom.
- Seal and refrigerate overnight (or up to 5 days). Add fresh toppings in the morning.
Recipe 2: Sheet Pan Chicken and Vegetables (the workhorse protein + veg)
Why it works for meal prep: One pan, 30 minutes, and it produces both your protein and your vegetables at once. This is the backbone of the whole week.
Ingredients:
– 2 lbs boneless, skinless chicken breasts
– 1 lb broccoli florets
– 2 bell peppers, sliced
– 1 red onion, cut into wedges
– 3 tbsp olive oil
– 2 tsp garlic powder
– 2 tsp smoked paprika
– 1 1/2 tsp salt
– 1 tsp black pepper
Steps:
1. Heat the oven to 425°F. Line two sheet pans with parchment.
2. Toss the vegetables with 2 tbsp olive oil, half the spices, and half the salt. Spread on one pan.
3. Rub the chicken with the remaining oil, spices, and salt. Arrange on the second pan.
4. Roast 20–25 minutes, flipping the vegetables once, until the chicken hits 165°F inside and the vegetables have browned edges.
5. Rest the chicken 5 minutes, then slice. Portion into containers with rice (below).
Time: 30 min | Makes ~5 lunch portions with rice
My take: Cut the chicken into strips before storing — it reheats more evenly than whole breasts, and it’s already bite-size for bowls.
Recipe 3: Turkey Taco Bowls (the flavor-breaker)
Why it works for meal prep: Ground turkey cooks in 10 minutes, the taco seasoning does all the flavor work, and it reheats beautifully. This is what you eat on Wednesday when plain chicken starts feeling repetitive.
Ingredients:
– 1 1/2 lbs ground turkey (93/7)
– 1 packet (1 oz) taco seasoning
– 1 can (15 oz) black beans, drained and rinsed
– 1 cup frozen corn
– 3 cups cooked brown rice (from your grain batch)
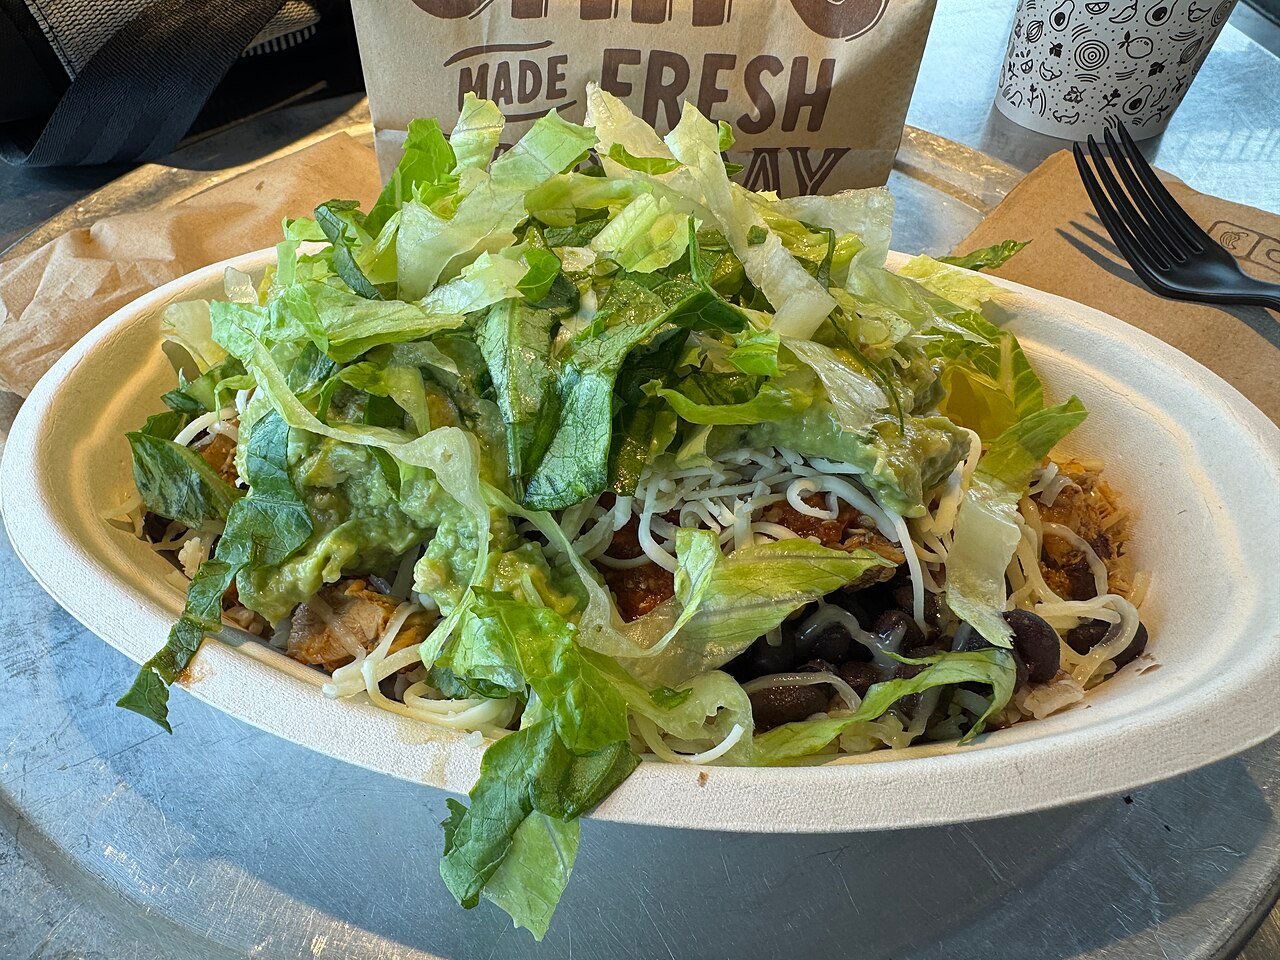
– Toppings for serving: salsa, shredded lettuce, diced avocado (add fresh, not prepped)
Steps:
1. Brown the turkey in a large skillet over medium-high heat, breaking it up, 7–8 minutes. Drain any excess fat.
2. Stir in the taco seasoning plus 1/3 cup water. Simmer 2 minutes.
3. Stir in the black beans and corn; cook 3 more minutes until heated through.
4. Portion over brown rice in containers. Pack salsa separately; add lettuce and avocado fresh at mealtime.
Time: 15 min | Makes 4–5 portions
Recipe 4: Mediterranean Chickpea Bowls (the meatless day)
Why it works for meal prep: No cooking at all — just roast the chickpeas while the chicken’s in the oven (they can share the heat). Chickpeas hold their texture for days, unlike a lot of plant proteins.
Ingredients:
– 2 cans (15 oz each) chickpeas, drained, rinsed, and patted very dry
– 2 tbsp olive oil
– 1 tsp smoked paprika
– 1 tsp cumin
– 3/4 tsp salt
– 2 cups cooked quinoa or brown rice
– 1 cucumber, diced (store separately)
– 1 cup cherry tomatoes, halved (store separately)
– Lemon-tahini dressing: 1/3 cup tahini, 3 tbsp lemon juice, 2 tbsp water, 1 clove garlic (minced), salt to taste — whisk until pourable
Steps:
1. Toss the dry chickpeas with olive oil, paprika, cumin, and salt. Spread on a sheet pan.
2. Roast at 425°F for 20–25 minutes, shaking once, until crisp at the edges.
3. Portion chickpeas over quinoa in containers. Pack cucumber, tomatoes, and dressing separately; assemble at mealtime.
Time: 25 min (mostly hands-off) | Makes 4 portions
My take: Patting the chickpeas truly dry is the whole game — wet chickpeas steam instead of crisping. A clean kitchen towel works better than paper towels here.
Recipe 5: Beef and Broccoli Stir-Fry (the “I need something different” dinner)
Why it works for meal prep: Faster than takeout, and the sauce keeps the beef juicy through reheating — which is the usual failure point for prepped red meat.
Ingredients:
– 1 lb flank steak, sliced very thin against the grain
– 4 cups broccoli florets
– 2 tbsp vegetable oil, divided
– 1/3 cup low-sodium soy sauce
– 2 tbsp brown sugar
– 1 tbsp cornstarch
– 3 cloves garlic, minced
– 1 tsp fresh ginger, grated
– 3 cups cooked white or brown rice
Steps:
1. Whisk the soy sauce, brown sugar, cornstarch, garlic, and ginger in a small bowl.
2. Sear the beef in a smoking-hot oiled skillet or wok, 1–2 minutes per side. Remove to a plate.
3. Add the remaining oil and broccoli with 2 tbsp water. Cover and steam 3 minutes until bright green.
4. Return the beef, pour in the sauce, and toss 1–2 minutes until glossy and thickened.
5. Portion over rice in containers.
Time: 20 min | Makes 4 portions
My take: Slice the beef while it’s still slightly firm from the fridge — 20 minutes in the freezer firms it up enough for those paper-thin slices that make stir-fry tender.
Storage and Food Safety Rules (Read This Part)
This is the unglamorous section that keeps you from getting sick. Meal prep is safe and easy if you follow the rules — they’re simple, and they’re non-negotiable. These basics line up with the federal food safety guidelines, and they’re the most important part of learning how to start meal prepping safely.
The 2-hour rule. Get cooked food into the fridge within 2 hours of cooking. (If your kitchen is hot — above 90°F — make it 1 hour.) Bacteria multiply fastest at room temperature, and “it was only out for a while” is how people get food poisoning. Set a timer if you need to.
The 3-to-4-day rule. Cooked meat, poultry, and most prepped meals are safe in the fridge for 3–4 days. That’s why this system preps Sunday for Sunday–Wednesday, with an optional mini-prep Wednesday evening for Thursday–Friday. If you want to prep a full 7 days at once, freeze days 5–7 and move them to the fridge the night before.
Cool it right. Spread hot food in shallow containers (not one deep pot) so it cools evenly, and don’t seal lids until the steam stops — about 20–30 minutes. Then refrigerate promptly.
Reheat to steaming. When reheating, get food to 165°F — steaming hot all the way through, not just warm on the edges. Stir microwaved food halfway. Only reheat something once; repeated cooling and reheating is where trouble starts.
Know what doesn’t prep well. Crispy things go soggy (pack crunchy toppings separately). Delicate greens wilt (pack salads undressed). Avocado browns (add fresh). Hard-boiled eggs, grains, roasted vegetables, sturdy proteins, and soups? Those are meal prep royalty.
When in doubt, throw it out. If it smells off, looks slimy, or you’re not sure how long it’s been in there — don’t taste-test your way to an answer. The $4 of food isn’t worth the gamble. This is also why labeling with the prep date matters so much.
7 Beginner Mistakes That Ruin Meal Prep (and How to Avoid Them)
If you’re figuring out how to start meal prepping, dodge these seven traps — they’re the reason most beginners quit by week three.
1. Prepping seven days of the same meal.
By Thursday you’ll hate the sight of it and order pizza out of spite. Fix: prep components, not identical meals — the mix-and-match system above gives you variety from the same cooking session.
2. Choosing recipes that don’t reheat well.
Cream sauces split, fried chicken goes rubbery, delicate fish dries out. Fix: for your first month, stick to proven reheats — grains, roasted veg, braised or saucy proteins, soups, and stews.
3. Skipping the labels.
“I’ll remember what’s in there” is a lie we all tell. Fix: masking tape + marker, date + contents, every container, every time. Thirty seconds now saves a mystery-meal gamble later.
4. Packing dressings and sauces on the food.
Three days of sitting in dressing turns crisp vegetables into mush. Fix: small separate sauce containers. Always. This is the highest-impact habit in all of meal prepping.
5. Prepping food you don’t actually like.
A “perfect” healthy meal you dread eating is a failed prep. Fix: prep versions of food you already enjoy. Love tacos? Prep taco bowls. The healthiest meal plan is the one you’ll eat.
6. The Sunday marathon.
Trying to prep everything in one giant session burns you out by week two. Fix: cap your session at 2 hours. If it doesn’t fit, you’re prepping too much — scale back, or split into two shorter sessions (Sunday + Wednesday).
7. Forgetting food safety.
Leaving food out for hours, eating week-old chicken, reheating three times. Fix: 2-hour rule to refrigerate, 3–4 days max in the fridge, reheat once to steaming. When in doubt, throw it out.
Your 5-Day Plan at a Glance
| Day | Breakfast | Lunch | Prep Time (Sunday) |
|---|---|---|---|
| Monday | Peanut Butter Overnight Oats | Sheet Pan Chicken + Rice + Broccoli | — |
| Tuesday | Peanut Butter Overnight Oats | Turkey Taco Bowl | — |
| Wednesday | Peanut Butter Overnight Oats | Mediterranean Chickpea Bowl | — |
| Thursday | Peanut Butter Overnight Oats | Beef and Broccoli Stir-Fry + Rice | — |
| Friday | Peanut Butter Overnight Oats | Leftovers / mix-and-match bowls | — |
| Sunday session total | ~90 minutes |
Grains note: cook one big batch of brown rice (about 3 cups dry) during your session — it covers the chicken, taco, and stir-fry portions. The chickpea bowls use quinoa or the same rice.

FAQ About How to Start Meal Prepping
How do I start meal prepping as a complete beginner?
Start with one meal, not the whole week. Pick the meal that stresses you out most (usually lunch), choose 2 proteins, 2 grains, and a few vegetables, and prep just 3–4 days’ worth. Once that feels easy — usually 2–3 weeks — add a second meal. The biggest beginner error is going from zero to seven days of three meals; that’s a recipe for burnout, not dinner.
What is the 3-3-3 rule for meal prep?
It’s a planning shortcut: pick 3 proteins, 3 vegetables (or carbs), and 3 sauces or flavor profiles for the week, then mix and match them into different meals. The point isn’t rigid rules — it’s limiting your decisions so shopping and cooking stay simple. My version in this guide is 2-2-3-2 (proteins, grains, vegetables, sauces), same idea.
How long does meal prepped food last in the fridge?
Cooked meat and poultry last 3–4 days refrigerated; cooked grains and roasted vegetables hold about the same. That’s why most preppers cook Sunday for Sunday–Wednesday and do a small second session midweek if needed. For anything you won’t eat within 4 days, freeze it — frozen prepped meals keep well for 2–3 months.
What containers are best for meal prepping?
Airtight, microwave-safe containers with locking lids — glass is the gold standard because it doesn’t stain or warp and you can see what’s inside. The 3-cup rectangular size fits most lunch and dinner portions. For salads and oats, mason jars work great. Whatever you buy, get one uniform size so they stack neatly.
How do I meal prep without getting bored of the food?
Prep components instead of finished meals. The same chicken, rice, and broccoli becomes a totally different meal with peanut sauce versus salsa versus lemon-tahini. Sauces and seasonings are where variety lives — cook fewer things, flavor them more ways. Also, give yourself one or two “wild card” meals a week with no prep involved.
Is meal prepping actually cheaper than eating out?
Almost always, by a wide margin. A week of prepped lunches typically costs what two or three takeout lunches cost — the savings come from buying with a plan instead of making daily impulse decisions when you’re hungry.
Can I meal prep if I don’t have much time?
Yes — that’s the whole point. A focused 90-minute session covers most of a week, which is less total time than cooking (or waiting for delivery) every single night. If even 90 minutes feels like a lot, start with just overnight oats and one sheet-pan dinner.
What foods should beginners avoid when meal prepping?
Anything that goes soggy, slimy, or sad after a day in the fridge: crispy fried foods, delicate salad greens (pack undressed and add dressing fresh), avocado (browns quickly — add at mealtime), and cream-based sauces (they can split on reheating). Stick to grains, roasted vegetables, sturdy proteins, beans, and soups while you’re learning — they’re practically indestructible.
Final Thoughts on Meal Prepping for Beginners
If you take one thing from this beginner’s guide on how to start meal prepping, let it be this: meal prepping is a system, not a cooking competition. You don’t need to impress anyone. You need lunch to exist on Wednesday without a crisis.
Start this Sunday. Not next Sunday, not “when things calm down” — this one. Make the overnight oats (10 minutes, no cooking) and one sheet pan of chicken and vegetables. That’s it. Five breakfasts and four lunches will appear in your fridge like magic, and you’ll wonder why you waited so long.
Then do it again next week. And the week after. That’s how a habit forms — not through one heroic Sunday, but through a simple system you don’t mind repeating. You’ve got this.
Starting your first prep this week? Tell me how it goes in the comments — I read every single one, and I love a good Sunday success story.

Founder of NestFlavors — sharing tested recipes and honest home ideas, made for real life.