
The right dining room light fixtures don’t just light your table — they decide how long people linger at it.
I’ve eaten under a bare 100-watt bulb that made a beautiful dinner feel like a cafeteria lunch, and I’ve eaten the same meal under a dimmed drum chandelier that made Tuesday night feel like an occasion. The food didn’t change. The light did. Dining room light fixtures are the single most underrated decor decision in the house, and most people pick them by vibes instead of math — then wonder why the room feels off.
This guide fixes that. You’ll get the three sizing formulas designers actually use (chandelier diameter in inches, hanging height above the table, and how many lumens your room really needs), plain-English bulb science (Kelvin, CRI, dimmers), and 14 dining room light fixture ideas for every table shape, ceiling height, and budget — including renter-friendly options that need zero rewiring.
I’ll be honest about my own learning curve: my first dining fixture was gorgeous in the store and ridiculous at home — too small, hung too high, with daylight bulbs that made everything look like a hospital waiting room. Every formula and rule in this guide exists because I (or someone I helped) got it wrong first. Learn from our mistakes; your dining room will thank you at every meal.
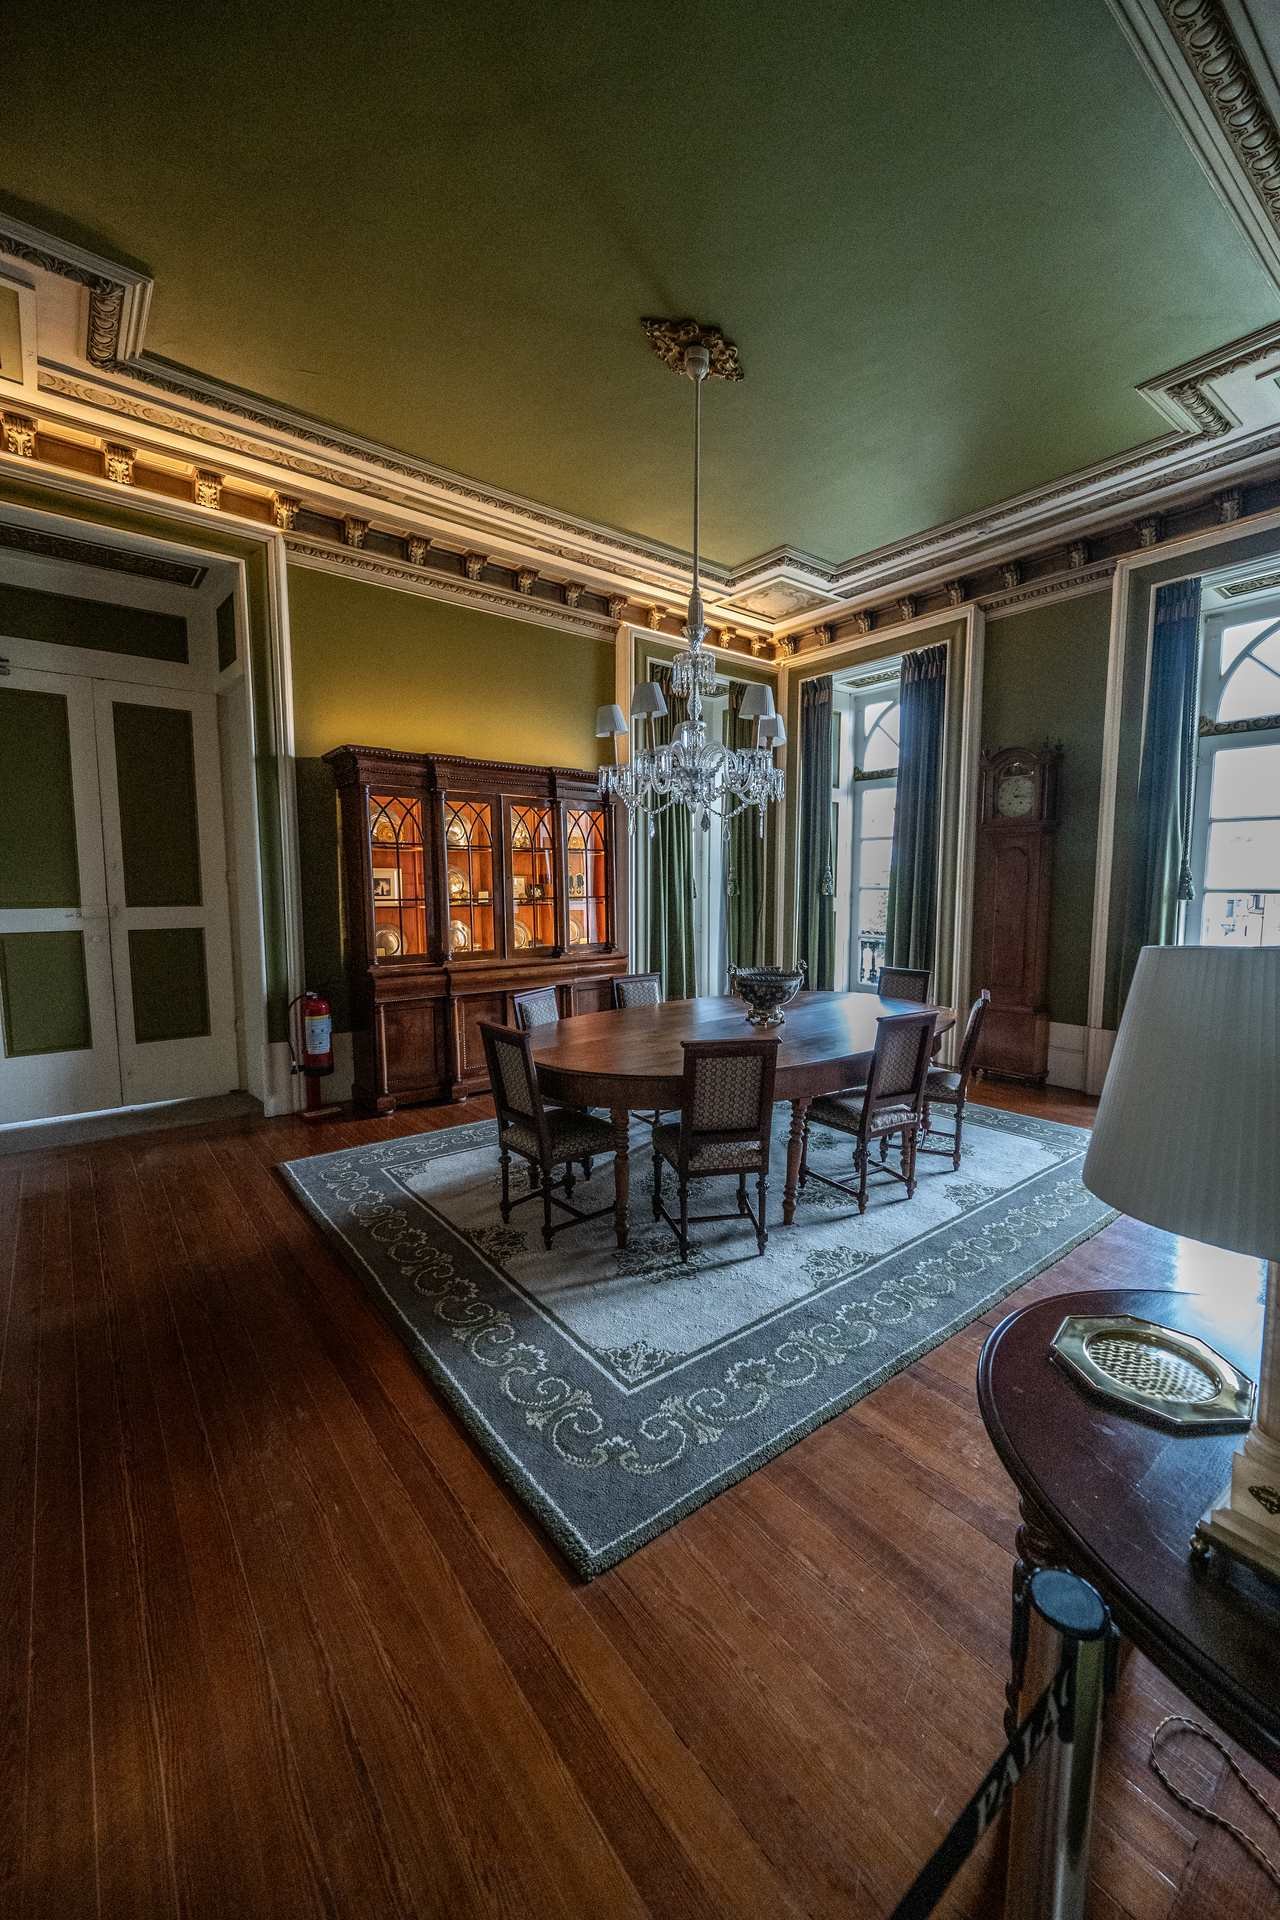
What Are Dining Room Light Fixtures?
Dining room light fixtures are ceiling, wall, and plug-in lights designed to illuminate a dining table and the eating area around it — including chandeliers, pendant lights, linear suspensions, flush and semi-flush mounts, and wall sconces.
What separates dining room light fixtures from generic ceiling lights is intent: a dining fixture is sized to the table (not the room), hung low enough to create intimacy (typically 30–36 inches above the tabletop), and chosen for warm, dimmable light that flatters food, faces, and the table itself.
Where living room lighting is about flexibility and kitchen lighting is about task clarity, dining lighting is about atmosphere with a job to do — it has to make the food visible and appetizing while making the people around the table look and feel their best. That dual job is why the same fixture that looks perfect in a foyer can feel completely wrong over a dining table.
The dining room is the one room where lighting does emotional work — it sets the mood for every meal, conversation, and celebration that happens there. Get it right and weeknight dinners stretch longer, guests linger, and the room earns its square footage. Get it wrong and even a beautifully set table feels like it’s waiting for something.
Why You’ll Love the Right Dining Room Light Fixtures
- Meals genuinely taste better in warm light. At 2700–3000K, wood glows richer, skin tones look healthy, and food looks appetizing — harsh cool light does the opposite to all three.
- One dimmer, two rooms. Bright for homework and meal prep, low and golden for dinner. A dimmable fixture is the cheapest room transformation you can buy.
- It anchors the whole design. The fixture is the visual center of the dining room — get it right and the table, chairs, and art all fall into place around it.
- Sized math beats guesswork. Two simple formulas (below) remove every bit of sizing anxiety. You’ll never squint at a showroom fixture wondering “too big?” again.
- Options exist for every ceiling. Eight-foot ceilings, sloped ceilings, rentals with no junction box where you need one — there’s a fixture strategy for all of it.
- It pays you back daily. Unlike a paint color you stop noticing, you experience your dining light at every single meal — breakfast, dinner, holidays. Few upgrades get used this often for this little money.
Buying Guide: Size Your Fixture With 3 Simple Formulas
Before you fall in love with new dining room light fixtures, run these numbers. They take five minutes with a tape measure and they prevent the two most common regrets: a chandelier that looks like a dollhouse miniature, or one that swallows the room.
Formula 1: Fixture diameter from the table
Your chandelier or pendant cluster should measure one-half to two-thirds of your table’s width (for round fixtures) or one-half to two-thirds of the table’s length (for linear fixtures). This keeps the light over the food and the fixture clear of elbows.
Worked examples:
| Table size | Target fixture diameter |
|---|---|
| 36-inch round table | 18–24 inches |
| 48-inch table | 24–32 inches |
| 60-inch table | 30–40 inches |
| 72-inch rectangular table | 36–48 inches (linear) |
| 84+ inches | Two fixtures, each ~1/3 of table length |
Pro move: when the formula gives you a range and you’re torn between two sizes, go bigger. Fixtures almost always read smaller in your room than they do in product photos — showrooms have 20-foot ceilings that lie to you.
Formula 2: Fixture diameter from the room
Add the room’s length and width in feet; that number, in inches, is your minimum sensible diameter. A 12-by-14-foot dining room sums to 26, so don’t go under 26 inches. This keeps the fixture proportional to the walls, not just the table.
Run both formulas and buy where they overlap. If the table says 22–28 inches and the room says 26 minimum, your target is 26–28 inches. When they disagree, the table formula wins for light quality, the room formula wins for looks — split the difference.
Formula 3: Hanging height above the table
For dining room light fixtures, the bottom of the fixture should sit 30–36 inches above the tabletop on a standard 8-foot ceiling. That height lands the light just above seated eye level, so guests see each other — not the fixture — across the table.
For taller ceilings, add 3 inches for every extra foot of ceiling height:
| Ceiling height | Hang height above tabletop |
|---|---|
| 8 feet | 30–36 inches |
| 9 feet | 33–39 inches |
| 10 feet | 36–42 inches |
| 11+ feet | 39–45 inches (or choose a two-tier design) |
Two height checks before you finalize: measure to the tabletop, not the floor (measuring from the floor is the most common error), and sit in every chair and check sightlines — nobody’s view across the table should be blocked. Also confirm at least 7 feet of floor clearance anywhere people walk under the fixture.
One more sizing truth for long tables: a single round fixture leaves the ends of a table over 60 inches dim. For rectangles, either pick a linear fixture spanning up to 12 inches shy of the table on each end, or hang two to three pendants spaced 24–30 inches apart along the table’s long axis. And center the fixture on the table — not the room. In open-concept spaces these are rarely the same point.
Brightness & Bulbs: Lumens, Kelvin, and CRI Explained
Beautiful dining room light fixtures, wrong bulb, sad room. The three numbers that matter are simpler than they sound.
Lumens = brightness. Aim for 20–30 lumens per square foot of dining room, across all light sources combined (up to 40 if you have dark walls or dark furniture that drinks light). The table fixture itself should deliver roughly 2,000–3,000 lumens.
Worked example: a 12×14-foot dining room is 168 square feet. At 25 lumens per square foot, you want ~4,200 total lumens. If your chandelier delivers 2,400 (say, six 400-lumen bulbs), the remaining 1,800 comes from sconces, a floor lamp, or recessed lights. That’s layered lighting — ambient light from the fixture, task light where you need it, accent light for art — and it’s what makes a room feel designed instead of just lit.
Kelvin = color. For dining rooms, buy 2700–3000K warm white — the soft golden glow of late afternoon, not the blue-white of an office (4000–5000K). Warm light makes wood richer and faces kinder. I run 2700K everywhere I eat and I will die on this hill.
CRI = color honesty. The Color Rendering Index measures how truthfully a bulb shows colors, on a 0–100 scale. Cheap bulbs sit around 80; for a dining room, look for CRI 90+ so food and finishes look like themselves. It’s printed on the bulb box — check before you buy.
Dimmers are non-negotiable. A dining fixture without a dimmer is a one-mood room. Dim to 30–40% for meals, full bright for homework or cleaning. Two caveats: confirm your bulbs are dimmable (not all LEDs are), and match the dimmer to the bulb type — old dimmers and new LEDs sometimes buzz or flicker together. A modern LED-rated dimmer costs about $25 and takes 20 minutes to install. The U.S. Department of Energy’s LED basics guide explains what the numbers on the bulb box mean if you want to dig deeper.
If your dining room light fixtures run on smart bulbs instead, skip the wall dimmer and use the app or voice control — but don’t mix smart bulbs with a traditional dimmer switch, since the two will fight and the bulbs will flicker.
Quick bulb cheat sheet for dining room light fixtures:
- Candelabra (E12) chandeliers: LED filament bulbs, 2700K, dimmable — they look like vintage incandescents and sip power.
- Pendants with exposed bulbs: same, but consider a frosted globe to soften glare at eye level.
- Drum shades: standard A19 LEDs, 2700–3000K; the shade diffuses everything.
- Avoid: anything labeled “daylight” (5000K+) in a dining room. It makes roast chicken look like a science experiment.
A word on visual weight. Two dining room light fixtures can share the same diameter and feel completely different in size. An open-frame sputnik or a clear-glass pendant reads light and airy; a fabric drum or a dense crystal chandelier reads heavy and substantial. If your room is small or your ceilings are low, lean toward open, airy designs at the larger end of your size range — you get presence without bulk. If the room is large with tall ceilings, a visually dense fixture fills the space better than an airy one of the same inches.
Sloped ceilings need a quick check. Most dining room light fixtures hang fine from a slope with an angled canopy adapter or a swivel mount (about $15) — but drum shades and linear fixtures can hang crooked if the mount doesn’t pivot. Check the product specs for “sloped ceiling compatible” before you buy, and measure the drop at the table’s center, not at the ceiling box.

Chandeliers That Anchor the Room
The chandelier is still the strongest choice over a dining table for one reason: it centers the room, throws light from multiple sockets at once, and scales naturally with table size. These three dining room light fixtures cover every style lane.
1. The Classic Crystal Chandelier
The look: faceted crystals catching candlelight-warm LEDs, traditional arms, timeless in a formal dining room. Why it works: crystal refracts light in every direction, so even a modest-lumen fixture feels luminous — the sparkle does work that raw wattage can’t.
Size it with Formula 1 and keep crystals clean (dust kills the refraction; a microfiber cloth twice a year is enough). Pair with 2700K candelabra LEDs — cool bulbs turn crystal icy. Try it: if full crystal feels too formal, look for “crystal accent” designs with just a few strands — the glow without the ballroom.
2. The Modern Drum Chandelier
The look: a fabric or metal drum shade on a chandelier frame — the minimalist’s answer to crystal. Why it works: the shade diffuses light softly downward and upward, so there’s zero glare at eye level. It’s the most forgiving fixture for open-concept spaces because it reads as sculpture, not ornament.
Drums run visually heavy, so lean toward the smaller end of your size range. Linen and cotton shades give the warmest light; metal drums throw crisper pools. Try it: a black or brass drum over a wood table is the fastest way to make a builder-grade dining room look intentional.
3. The Sputnik Chandelier
The look: mid-century starburst — arms radiating from a central sphere, bulbs at the tips. Why it works: it’s pure personality, throws light in all directions, and suits modern, eclectic, and mid-century dining rooms that would reject anything traditional.
Because bulbs point outward, use frosted or small-globe bulbs to avoid bare-bulb glare from across the table. Sputniks photograph large, so measure twice — a 24-inch sputnik has more visual energy than a 24-inch drum. Try it: brass sputnik + walnut table + white walls is a combination that has never once looked bad.
Pendant Lighting Ideas
Pendants are the versatile middle ground of dining room light fixtures — more contemporary than a chandelier, more presence than a flush mount. They shine in casual dining areas, breakfast nooks, and anywhere the ceiling is on the lower side.
4. One Oversized Statement Pendant
The look: a single large pendant — 20+ inches wide — floating over the table like a piece of art. Why it works: one confident object beats three timid ones. It gives you the drama of a chandelier with cleaner lines and usually a lower price.
This is my pick for square tables: one big dome, cone, or globe pendant sized at half to two-thirds of the table width. Hang it at the standard 30–36 inches. Because there’s only one fixture to wire and one shade to clean, it’s also the lowest-maintenance statement you can make — and single pendants tend to cost less than multi-light chandeliers with the same visual impact. Try it: an oversized rattan or metal dome in matte black grounds a light-colored dining set instantly.
5. A Trio of Mini Pendants
The look: three small pendants (10–14 inches each) in a row, spaced 24–30 inches apart on center. Why it works: it stretches light along a rectangular table so no seat sits in shadow, and it lets you mix finishes — all brass, or brass-black-brass for rhythm.
The spacing matters more than the pendants themselves: too close and they merge into one blob; too far and you get dark gaps. Measure and mark before the electrician arrives. Try it: hang them at slightly staggered heights (2 inches apart) for a custom, collected feel — just keep the lowest one above sightline height.
6. The Woven Rattan Pendant
The look: natural woven shade — rattan, wicker, or seagrass — casting patterned shadows. Why it works: texture is the fastest way to warm up a dining room, and woven shades turn a plain bulb into ambient art. Perfect for coastal, boho, farmhouse, and Japandi dining spaces.
One caution: woven shades are semi-transparent, so the bare bulb can glare through the weave. Use a frosted bulb or a shade with a diffuser disc at the bottom. Try it: pair with 2700K bulbs only — warm light through rattan is candlelight-adjacent; cool light through rattan is a beach interrogation.
Linear Suspensions for Long Tables
Long rectangular tables (72 inches and up) are where single round dining room light fixtures fail — the ends go dim and the middle gets all the glory. Linear fixtures solve it by matching the table’s shape.
7. The Rectangular Linear Chandelier
The look: a long, narrow fixture — sometimes called a linear suspension or island chandelier — running parallel to the table. Why it works: it distributes light end to end, mirrors the table’s footprint so the composition looks inevitable, and suits modern farmhouse, contemporary, and transitional dining rooms.
Target length: two-thirds of the table’s length, staying at least 6 inches shy of each end. A 72-inch table wants a 36–48-inch fixture. Keep the profile slim — deep linear fixtures can loom over the table visually. Try it: black metal frame + wood table + linen chairs is the modern-farmhouse formula that never misses.
8. A Row of Three Glass Pendants
The look: three clear or seeded-glass pendants in a line, bulbs visible inside. Why it works: glass disappears visually, so you get three points of light without three visual obstacles — the room stays airy while the table stays lit.
Clear glass demands pretty bulbs (LED filaments, 2700K) because everyone sees them. Seeded or ribbed glass hides the bulb and adds texture — more forgiving, slightly less bright. Try it: hang on adjustable cords and set the middle pendant 2 inches lower than the outer two for a subtle arc that echoes the table.
Flush & Semi-Flush Mounts for Low Ceilings
Ceilings under 8 feet change the game — a hanging chandelier becomes a head injury. Flush mounts (hugging the ceiling) and semi-flush mounts (dropping 4–8 inches) trade drama for headroom while still giving the dining area a proper focal point.
9. The Linen Drum Semi-Flush
The look: a fabric drum that drops just a few inches from the ceiling — the low-ceiling cousin of the drum chandelier. Why it works: you keep the soft diffused glow and the sculptural presence without sacrificing headroom. It reads “designed” in a way a bare flush dome never does.
Choose a drum at least 20 inches wide so it doesn’t look like an afterthought, and pick linen over silk-look polyester — real texture diffuses warmer. Try it: in a dining nook with 7.5-foot ceilings, this is the single best fixture choice you can make.
10. The Schoolhouse Flush Mount
The look: the classic opal-glass schoolhouse shade — vintage, cheerful, honest. Why it works: milk glass diffuses beautifully, the profile is nearly flat, and the style flatters farmhouse, vintage, and eclectic dining rooms at a price that leaves budget for everything else.
Go for the largest diameter your table allows (remember Formula 1 — it applies to these dining room light fixtures too). Opal glass + 2700K bulb = the warmest, kindest light of any fixture on this list. Try it: pair with a dimmer and you have a $60 fixture performing like a $400 one.
11. The Modern Globe Semi-Flush
The look: one large opal globe (or a cluster of small ones) floating just below the ceiling on short stems. Why it works: it’s the contemporary answer to the schoolhouse — sculptural, glare-free, and it works in modern, Scandinavian, and minimalist dining rooms where traditional shapes feel fussy.
A single 14–16-inch globe suits a 48-inch round table; for larger tables, look for three-globe clusters. Because globes glow in all directions, they also wash the ceiling — which makes low ceilings feel higher. Try it: brass stems + white globe is the combination lighting designers reach for when they want modern without cold.
Wall Sconces & Renter-Friendly Layers
Overhead dining room light fixtures do the heavy lifting, but sconces do the flattering. A pair of wall sconces adds the second layer that takes a dining room from “lit” to “designed” — and two of the three ideas below need no electrician at all.
12. Flanking Sconces on the Buffet Wall
The look: two matching sconces framing a sideboard, mirror, or art on the dining room’s main wall. Why it works: symmetry reads as intention, and the sconces wash the wall with warm light that makes the whole room glow. They also give you light at face height — the most flattering angle there is.
Mount them 60–66 inches from the floor to the center of the shade, roughly 6 feet apart. Hardwired is ideal, but plug-in sconces with cord covers do the same job for renters — and at $50–$100 per pair versus a few hundred for an electrician visit, they’re the budget play even for homeowners. If you go plug-in, run the cords down inside paintable cord channels so they read as intentional, not improvised. Try it: aim the shades upward for ambient wash, or choose adjustable-arm sconces to spotlight art on the same wall.
13. The Plug-In Pendant (Swag-Hook Style)
The look: a pendant that plugs into a wall outlet, its cord draped across the ceiling on swag hooks to hang exactly over the table. Why it works: it puts a real pendant — one of the most flexible dining room light fixtures for renters — exactly where you want it, centered on the table, not wherever the builder put the junction box. Zero wiring, zero landlord drama.
Use ceiling-rated swag hooks with adhesive or small anchors, and a cord cover down the wall to the outlet. Choose a lightweight shade (rattan, paper, fabric) so the hooks carry minimal weight. Try it: this is the fix for the classic rental problem where the ceiling box sits three feet off-center from the table.
14. Battery Sconces as Candlelight 2.0
The look: slim, remote-controlled sconces that mount with adhesive strips — no wires, no outlets needed. Why it works: they add flickering-warm accent light on a buffet wall or flanking a mirror, with timers and dimming from a remote. Modern battery sconces run months on a charge.
They’re accent light, not task light — don’t expect them to illuminate the table. But for the glow layer that makes dinner feel like dinner, they’re unbeatable in rentals. Try it: set the timer for 6pm–11pm and forget it exists; the room lights itself every evening.
Finish & Material Pairings: What Goes With Your Table
Picking the right dining room light fixtures is half the decision; the finish is the other half. The rule is simple: repeat one metal and one material already in the room. Brass fixture with brass cabinet pulls, black fixture with black window frames, rattan shade with oak table — repetition is what makes a room feel designed instead of decorated.
Brass and gold tones warm up white, cream, and sage dining rooms and flatter wood tables of every shade. Brushed and aged brass feel current; mirror-polished brass can read dated unless the rest of the room is equally glamorous. Matte black is the universal neutral of dining room light fixtures — it grounds light-colored rooms, disappears against dark walls, and pairs with literally any wood tone.
Chrome and polished nickel suit cool palettes (grays, blues, white) and modern spaces, but they show every fingerprint, so think twice with small kids. Natural materials — rattan, wicker, linen, wood beads — add texture and warmth, and they’re the easiest way to soften a room full of hard surfaces.
You don’t need to match every metal in the room — mixed metals are fine as long as one dominates. The combination to avoid is three competing statement finishes (say, chrome fixture + brass hardware + black chairs) with nothing repeated. Pick a lead, give it a supporting act, and let everything else be quiet.
One practical note: finishes affect light quality. Polished metals bounce sharper, brighter reflections; matte and fabric finishes diffuse softer. In a dining room where the goal is glow, matte and textured almost always win.
Renter Hacks: Great Dining Light Without Rewiring
Here’s the angle most lighting guides skip: a huge share of dining rooms are rentals, and renters can’t move junction boxes, add wiring, or sometimes even change a fixture. But “can’t rewire” doesn’t mean “stuck with the boob light.” These are the moves that actually work:
Swag the existing fixture. If the ceiling box is off-center from the table (it usually is), a swag hook and extra chain lets you drape the fixture to center. $10 in hardware, fully reversible.
Go plug-in for everything new. Plug-in pendants, plug-in sconces with cord covers, and arc floor lamps all bypass the ceiling box entirely. Cord covers painted wall-color disappear.
Change the shade, not the fixture. Many rentals allow dining room light fixtures to be swapped if you keep the original (store it, reinstall when you leave). A $40 rattan shade over the existing socket transforms the room for the cost of lunch.
Layer with lamps. An arc floor lamp over the table’s end plus a buffet lamp on the sideboard gives you the two-layer look with zero ceiling work. Put both on warm bulbs and a smart plug.
Bulbs are decor. Swapping 5000K daylight bulbs for 2700K dimmables is the highest-impact $20 in rental lighting. Do this before you buy anything else — I’ve seen it single-handedly fix rooms people were ready to repaint.
Ask about the dimmer. Many landlords will say yes to a dimmer swap (it’s a 20-minute job and improves their property). Offer to leave it installed when you go.
Common Mistakes to Avoid
- Sizing by showroom, not by tape measure. Fixtures read 20–30% larger in photos and showrooms than in your room. Run Formula 1 and Formula 2 before you shop — not after you fall in love.
- Hanging dining room light fixtures too high. The “floating near the ceiling” look disconnects the fixture from the table and kills intimacy. Thirty to 36 inches above the tabletop on 8-foot ceilings; measure to the table, not the floor.
- Centering on the room instead of the table. In open-concept spaces, the ceiling box is often nowhere near the table. Center the light over the food — swag it, or go plug-in.
- Skipping the dimmer. A dining room has at least three moods (bright prep, dinner, late conversation). One switch position can’t serve all three.
- Daylight bulbs in the dining room. Anything 4000K+ makes food and faces look harsh. 2700–3000K, always — check the box, not the marketing name.
- Ignoring CRI. Two 2700K bulbs can render colors completely differently. CRI 90+ is what makes the tomatoes look like tomatoes.
- One light source total. A single overhead fixture flattens everything. Add one more layer — sconces, a buffet lamp, even candles — and the room gains depth.
- Blocking sightlines. If anyone has to peer around the fixture to talk, it’s too low or too wide. Sit in every seat before you lock the height.
- Buying the fixture before measuring the table. It sounds obvious, but showroom love is powerful. Measure your table’s width and length, measure your ceiling height, and write the target numbers on your phone before you browse. Shopping with numbers turns an emotional purchase into a confident one — and it kills the “will it fit?” anxiety that ruins the fun.
Dining Room Light Fixtures at a Glance
| Fixture type | Best for | Size rule | Hang height | Budget range |
|---|---|---|---|---|
| Crystal chandelier | Formal dining rooms | ½–⅔ table width | 30–36″ above table | $150–$800+ |
| Drum chandelier | Modern, open-concept | ½–⅔ table width | 30–36″ above table | $120–$500 |
| Sputnik chandelier | Mid-century, eclectic | ½–⅔ table width | 30–36″ above table | $100–$400 |
| Statement pendant | Square tables, nooks | ½–⅔ table width | 30–36″ above table | $80–$350 |
| Mini pendant trio | Rectangular tables | 10–14″ each, 24–30″ apart | 30–36″ above table | $120–$400 |
| Linear suspension | Long tables (72″+) | ⅔ table length | 30–36″ above table | $150–$600 |
| Semi-flush mount | Ceilings under 8 ft | ½–⅔ table width | 4–8″ drop from ceiling | $60–$250 |
| Flush mount | Low ceilings, casual | ½–⅔ table width | At ceiling | $40–$150 |
| Wall sconces | Buffet walls, layering | Pair, 6 ft apart | 60–66″ from floor | $50–$200/pair |
| Plug-in pendant | Rentals, off-center boxes | ½–⅔ table width | 30–36″ above table | $60–$200 |
FAQ About Dining Room Light Fixtures
How big should a chandelier be over a dining table?
Size the chandelier’s diameter at one-half to two-thirds of your table’s width — a 48-inch-wide table wants a 24–32-inch fixture. Also run the room formula: room length plus width in feet, converted to inches, is your minimum diameter. When the two ranges overlap, buy toward the larger end; fixtures read smaller in real rooms than in photos.
How high should dining room light fixtures hang?
Hang the bottom of the fixture 30–36 inches above the tabletop on an 8-foot ceiling. Add 3 inches for every extra foot of ceiling height — so 33–39 inches on a 9-foot ceiling. Always measure from the tabletop (not the floor) and sit in every chair to confirm nobody’s view across the table is blocked.
What is the best color temperature for dining room lighting?
2700–3000K warm white is the sweet spot — it flatters food, wood tones, and skin. Avoid 4000K+ “daylight” bulbs in dining rooms; they make everything look harsh and clinical. Pair your warm bulbs with a high CRI (90+) so colors render truthfully.
How many lumens do I need in a dining room?
Plan for 20–30 lumens per square foot across all light sources (up to 40 with dark walls or furniture), with 2,000–3,000 lumens coming from the table fixture itself. A 168-square-foot dining room needs roughly 4,200 total lumens — the chandelier covers about half, sconces or lamps cover the rest.
Should dining room light fixtures be dimmable?
Yes — a dimmer is the single best upgrade for any dining fixture. Run full brightness for homework and cleanup, then dim to 30–40% for meals. Just confirm your bulbs are labeled dimmable and pair them with an LED-rated dimmer to avoid buzzing or flicker. If you’re using smart bulbs, control dimming through the app instead and leave the wall switch fully on — combining smart bulbs with a traditional dimmer causes flicker.
Can I put a chandelier in a dining room with 8-foot ceilings?
Absolutely — 8 feet is the standard ceiling the 30–36-inch rule is built for. Below 8 feet, switch to a flush or semi-flush mount instead; a hanging fixture will crowd headroom and sightlines. Above 9 feet, raise the fixture 3 inches per extra foot or choose a two-tier design to fill the vertical space.
What if my ceiling light isn’t centered over the table?
Center the light on the table, not the room — use a swag hook and extra chain to drape a hardwired fixture into position, or hang a plug-in pendant from swag hooks with the cord run down the wall in a cord cover. Both are renter-friendly and fully reversible.
Do I need an electrician to install a dining room fixture?
For swapping dining room light fixtures on an existing junction box, many confident DIYers do it themselves (power off at the breaker, always). You need an electrician for new wiring, moving a box, adding a dimmer you’re unsure about, or any fixture heavier than your box is rated for — check the weight rating before hanging anything substantial.
Final Thoughts
Here’s everything that matters in one breath: size your dining room light fixtures to the table with real math, hang them 30–36 inches above the tabletop, light them warm (2700–3000K) and honest (CRI 90+), put them on a dimmer, and add one more layer of light somewhere. Do that and the fixture almost picks itself.
The dining room is where your home does its most human work — meals, conversations, the long linger after dessert. Light it like it matters, because everyone at the table can feel the difference.
Start with the math, not the shopping: measure your table, measure your ceiling, write down your target diameter and hang height. Then pick the fixture type that fits your table shape, choose bulbs at 2700–3000K with CRI 90+, and put the whole thing on a dimmer. That sequence — measure, match, warm, dim — is the entire secret. Everything else is style, and style is the fun part.
Now tell me: which of these 14 is going over your table?

Founder of NestFlavors — sharing tested recipes and honest home ideas, made for real life.